Liquidity Pool
Create a pool and add liquidity
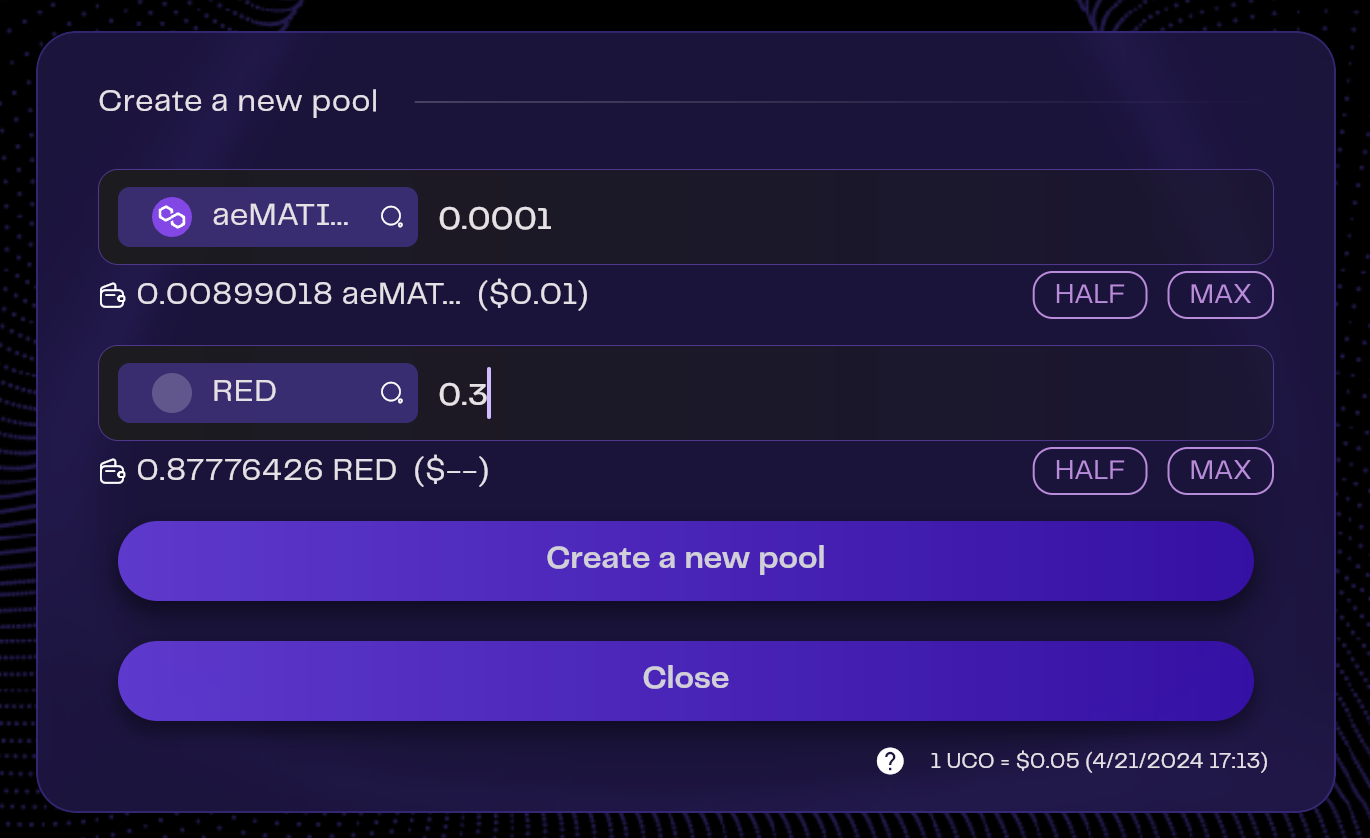
You can create a liquidity pool from the liquidity menu via the "Create a pool" button.

Step 1: Creating a Liquidity Pool: Essential Information
To establish a liquidity pool on aeSwap, the following information is necessary:
- Token Pair: Identify the two tokens that will constitute the pair within the pool.
- Initial Investment: Specify the amount of each token you intend to contribute. This initial contribution determines the pool's initial price ratio.
Pre-creation Validations
Before creating a liquidity pool, the system conducts several checks to ensure compliance and feasibility:
- Unique Pair Check: Ensures that a pool with the selected token pair does not already exist.
- Liquidity Requirements: Confirms that your Archethic wallet holds a sufficient quantity of the tokens intended for liquidity provision.
When creating a pool involving UCO (the native token of the Archethic Public Blockchain), the system automatically calculates and reserves the necessary amount for transaction fees associated with pool creation and liquidity addition. As a result, the maximum amount of UCO that can be allocated is less than your total UCO balance to accommodate these costs.
Step 2: Finalizing Pool Creation: Confirmation and Validation Steps
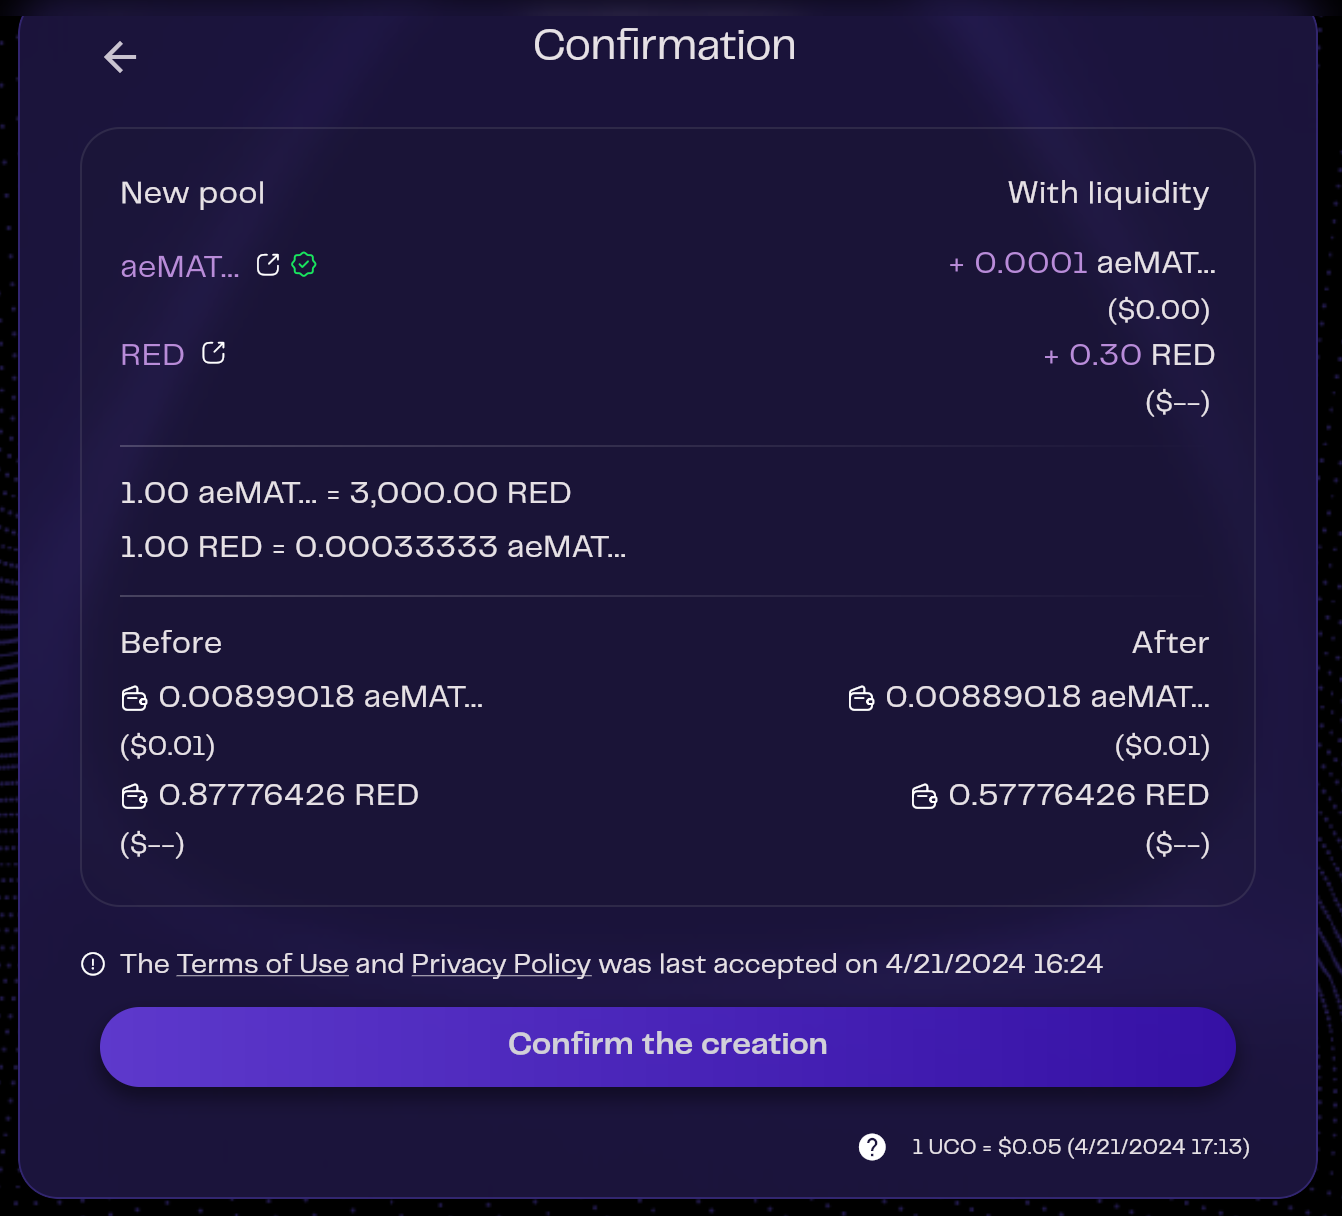
After you submit the pool creation form by clicking the "Create a new pool" button, you will be directed to a confirmation screen. This screen serves a critical role in the pool creation process, enabling you to:
- Review Token Ratio: Examine the initial ratio between the two tokens in your new pool to ensure it aligns with your expectations.
- Balance Verification: Check your account balances before and after liquidity is added to understand the impact of your transaction. If the details align with your intentions and you are content with the proposed setup, proceed by clicking on the "Confirm the creation" button to move forward in the process.
Wallet Validations for Liquidity Transactions
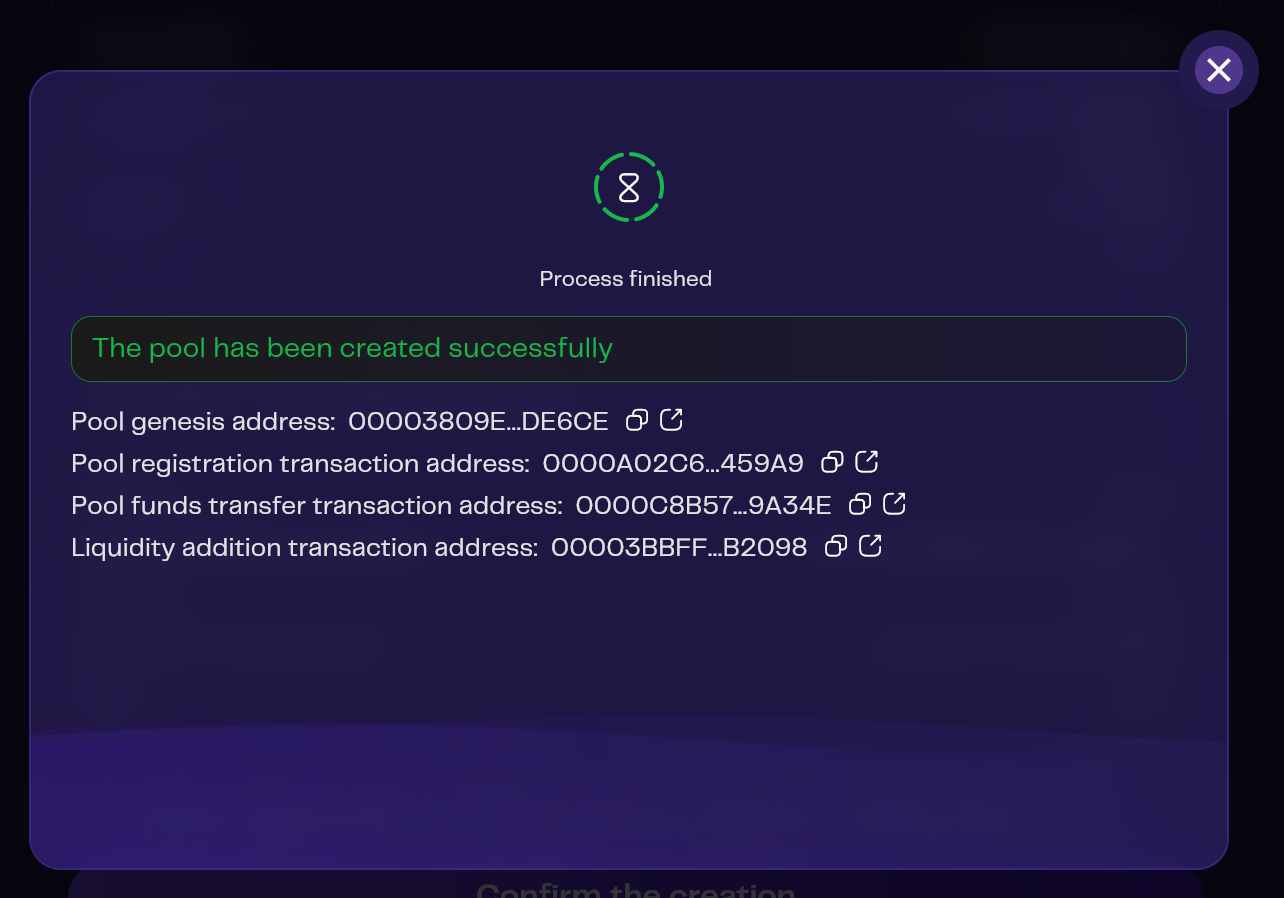
The creation of the pool and addition of liquidity to the pool necessitate two separate validations within your Archethic wallet:
Transaction Confirmation: You will need to approve two transactions – one for creating the pool and another for adding liquidity to it.
Transaction Addresses: Upon successful completion of these transactions, you will be provided with their addresses. These addresses allow you to verify the transactions on the blockchain, ensuring transparency and security in your operations.
Navigating Pool Information
aeSwap offers a unique and engaging way to access detailed information about each liquidity pool through an interactive card. You can easily explore this card by clicking on the turn icon to "rotate" the view, revealing comprehensive details about the pools in a visually intuitive manner.
Front View: Essential Pool Details
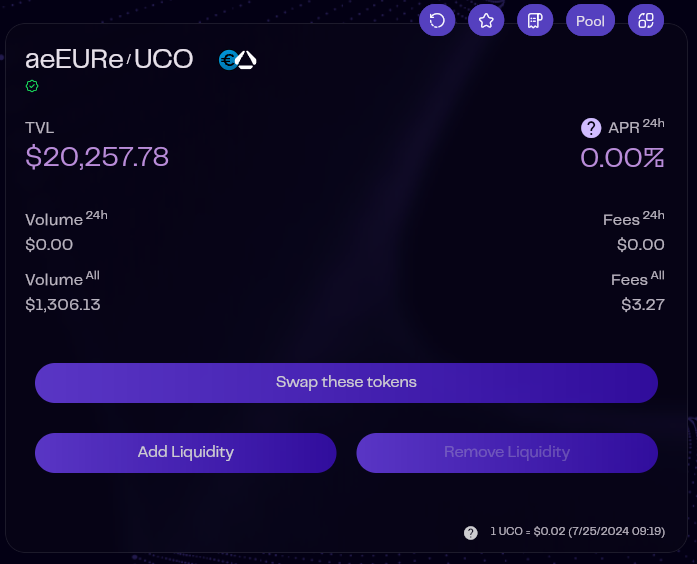
When viewing the front of the card, users are presented with a rich set of information designed to provide a quick and informative snapshot of each pool:
- Token Pair and Logos: Each pool is represented by its pair of tokens, accompanied by their logos when available, for easy identification.
- Verification Status: A green icon signifies that the pool has been officially verified by Archethic, indicating a layer of trust and security.
- Personal Liquidity Contribution: If you have added liquidity to a pool, a yellow star icon will highlight your participation, making it easy to track your investments.
- Total Value Locked (TVL): The TVL is displayed in dollars, offering a clear view of the pool's size and the total capital invested.
- Annual Percentage Rate (APR) Over 24 Hours: The APR is displayed to indicate the potential return on investment over a year, based on the pool’s performance during the last 24 hours. This provides a quick snapshot of profitability to help users assess the attractiveness of investing in the pool.
- Trading Dynamics: Detailed statistics on trading volume and fees collected over the last 24 hours and cumulatively are provided to give users insights into the pool's activity and profitability.
Back View: Exploring Pool Details
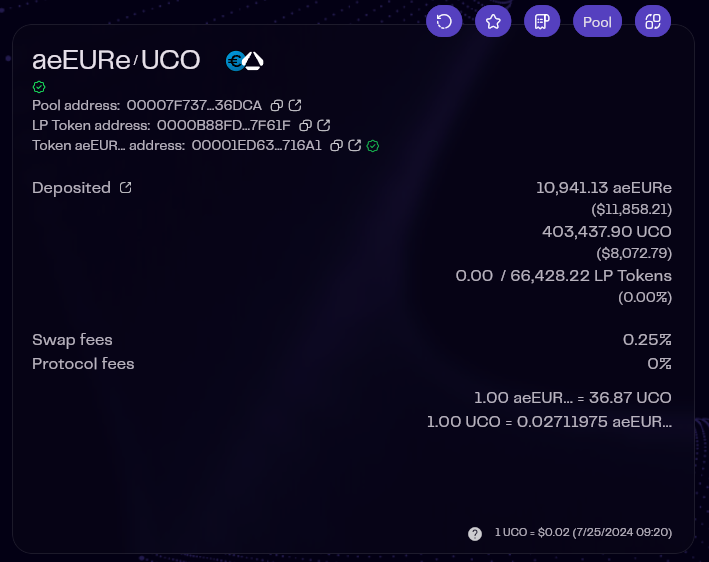
You can find in this side of the card:
- Pool Address: Displayed prominently for easy reference. Accompanying the address, an icon for quick copying allows users to easily share or save the address. - Additionally, a separate icon links directly to the blockchain explorer, where users can delve into full details and analytics of the pool.
- Token Holdings: This section lists the exact number of tokens currently deposited within the pool, providing a clear view of the pool's liquidity depth.
- Swap Fee Percentage: The fee charged for swap transactions within this particular pool is displayed as a percentage. This fee contributes to the rewards earned by liquidity providers, representing an essential metric for potential and current investors.
Interacting with Pools: Available Actions
On aeSwap, participants have the flexibility to engage with liquidity pools through a variety of actions, each designed to suit different strategies and needs. Here’s a concise overview of the options available:
Exchange Pool Tokens: Users can swap tokens within a pool, utilizing the liquidity available to exchange one token for another. This action is fundamental to the operation of a DEX, allowing users to seamlessly trade assets at current market rates determined by the pool's liquidity and token ratio.
Add Liquidity: If you're looking to contribute to a pool, this action enables you to deposit your tokens into the pool. Adding liquidity increases the pool's total value locked (TVL) and, in return, you receive liquidity provider (LP) tokens. These LP tokens represent your share of the pool and entitle you to a portion of the trading fees generated by the pool's activity.
Remove Liquidity: When you wish to retrieve your deposited tokens from a pool, this action allows you to do so. By returning your LP tokens, you can claim back your share of the pool, along with any accrued fees, based on the current ratio of tokens within the pool. This action is essential for managing your investments and realizing potential gains from fee accumulation.
Fees
For enhancing %APR, liquidity, and volume, all fees are returned to LP suppliers: 0.3% LP provider fee, 0% protocol fee.
Specificity of the aeETH / UCO pair
Archethic offers a specific aeETH/UCO pool featuring a new farming mechanism designed to reward long-term commitment. This update provides UCO holders with flexible levels and the potential for higher rewards through a tiered system, reinforcing our mission to support sustained engagement with our project.
With our new Leveling System on the aeETH/UCO pool, we’ve removed LP provider fees on this pool: 0.3% Protocol Fees, 0% LP Provider Fees on the aeETH/UCO pool.
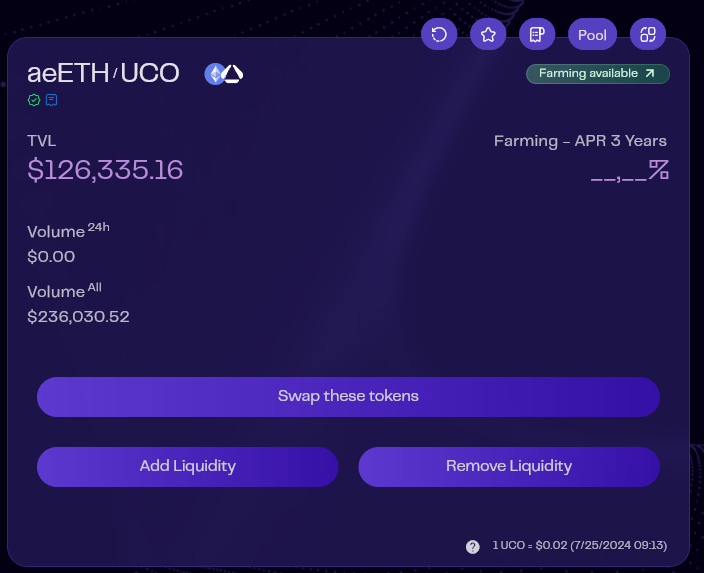
For the specific aeETH/UCO pool, the displayed information is unique:
3-Year APR of the Associated Farm: Instead of showing the fees collected by the pool, we display the 3-year APR of the farm associated with the pool. A link is provided to allow users to access the farm directly.
Add Liquidity
Enhancing your portfolio by adding liquidity to a pool is a straightforward process designed for ease of use and efficiency. Here's how you can contribute to the liquidity of your chosen pool:
Step 1: Adding Liquidity: Essential Information
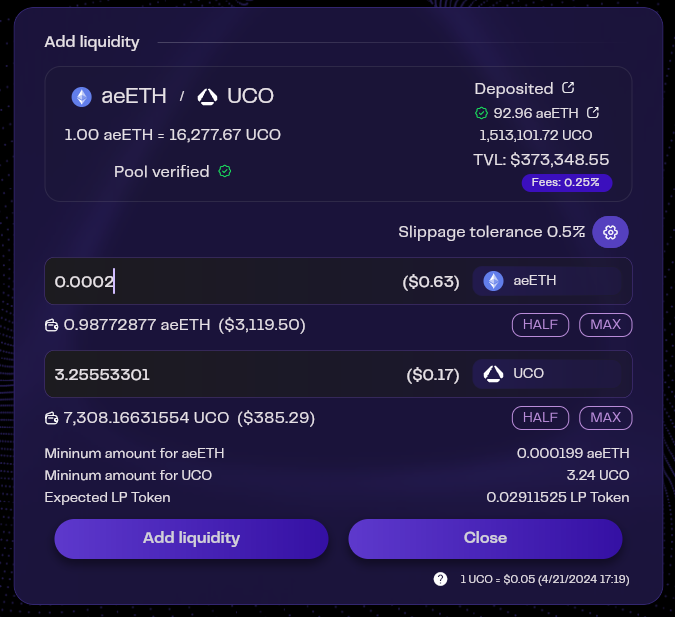
Entering Token Amounts: Begin by inputting the amount of one of the two tokens in the pool's pair. The system will automatically calculate the necessary amount of the second token based on the current pool ratio, ensuring your contribution maintains the pool's balance.
Slippage Tolerance Configuration: To manage the impact of price fluctuations during your transaction, click on the wheel icon next to "slippage tolerance." Slippage occurs when the price at which your transaction is executed differs from the price when you submitted it. Adjusting your slippage tolerance allows you to control the maximum price variation you're willing to accept.
Transaction Details: Once you've set the amounts, the system will display information about your transaction:
- Minimum Token Amounts: The least amount of each token that will be added to the pool, considering slippage and transaction timing.
- Estimated LP Tokens: An estimation of how many liquidity provider (LP) tokens you'll receive in return. These tokens represent your share of the pool and your entitlement to a portion of the trading fees.
Add Liquidity: Click the "Add liquidity" button to finalize your contribution. This action initiates the transaction and adds your tokens to the pool.
Pre-transaction Validations
Before adding liquidity, the system performs a vital check to ensure:
- Token Availability: Verifies that the necessary tokens are available in your wallet for the liquidity addition.
When adding liquidity involving UCO (the native token of the Archethic Public Blockchain), the system automatically calculates and reserves the necessary amount for transaction fees associated with liquidity addition. As a result, the maximum amount of UCO that can be allocated is less than your total UCO balance to accommodate these costs.
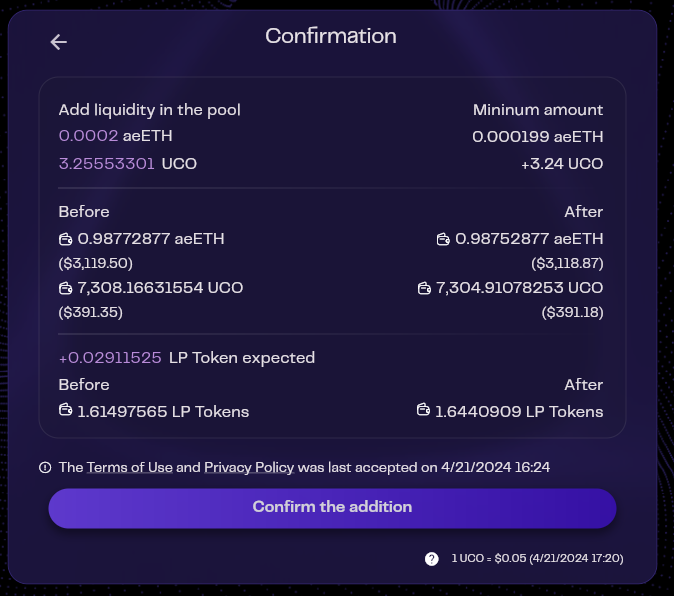
Step 2: Finalizing Liquidity Addition: Confirmation and Validation Steps
After you submit the liquidity addition form by clicking the "Add liquidity" button, you will be directed to a confirmation screen. This screen serves a critical role in the liquidity addition process, enabling you to:
- Review Token Ratio: Examine the initial ratio between the two tokens in your new pool to ensure it aligns with your expectations.
- Balance Verification: Check your account balances before and after liquidity is added to understand the impact of your transaction. If the details align with your intentions and you are content with the proposed setup, proceed by clicking on the "Confirm the creation" button to move forward in the process.
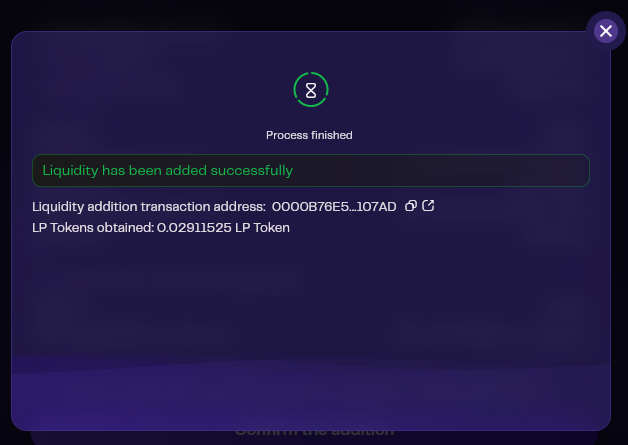
Wallet Validations for Liquidity Transactions
The addition of liquidity to the pool necessitates two separate validations within your Archethic wallet:
Transaction Confirmation: You will need to approve 1 transaction.
Transaction Address: Upon successful completion of this transaction, you will be provided with the address. This address allows you to verify the transaction on the blockchain, ensuring transparency and security in your operation.
Remove Liquidity
Withdrawing your liquidity from a pool is a flexible process that can be initiated at any time, allowing you to reclaim all or a portion of your deposited tokens.
Step 1: Removing Liquidity: Essential Information
The process begins with the user entering the amount of LP (Liquidity Provider) tokens they wish to redeem. This action is facilitated through a user-friendly form designed to make the withdrawal process as straightforward as possible.
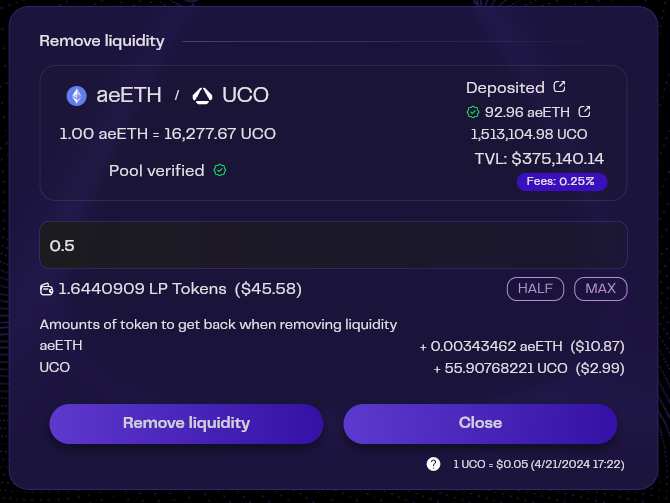
Entering LP Token Amounts: The amount of LP tokens you wish to use for the withdrawal. LP tokens represent your share of the pool's total liquidity.
Transaction Details: Once you've set the amount, the system will display information about your transaction:
- Amounts of token to get back: This crucial piece of information tells you exactly how many of each token in the pool you will receive in return for the specified amount of LP tokens. This is calculated based on the current ratio of tokens within the pool and the total amount of liquidity you're choosing to withdraw. By presenting these details, the system aims to provide users with a clear understanding of the outcome of their liquidity removal transaction, allowing for precise and confident decision-making.
Remove Liquidity: Click the "Remove liquidity" button to finalize your withdrawal. This action initiates the transaction, removes (or "burns") your LP tokens from circulation, and the corresponding amount of the original tokens you provided as liquidity will be returned to you. The exact amounts are calculated according to the current liquidity ratio within the pool and the total number of LP tokens you are redeeming.
Pre-transaction Validations
Before removing liquidity, the system performs a vital check to ensure:
- Token Availability: Verifies that the necessary LP tokens are available in your wallet for the liquidity removal.
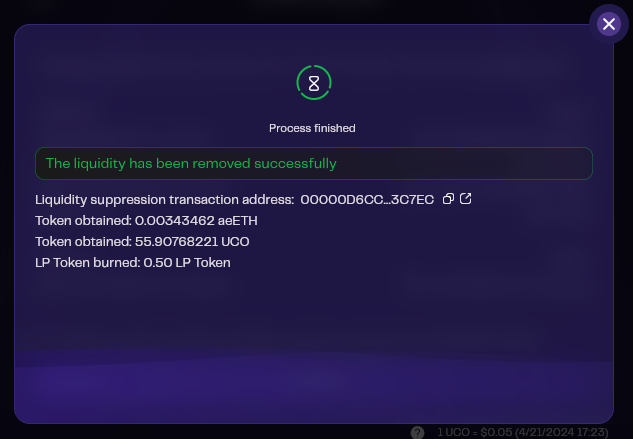
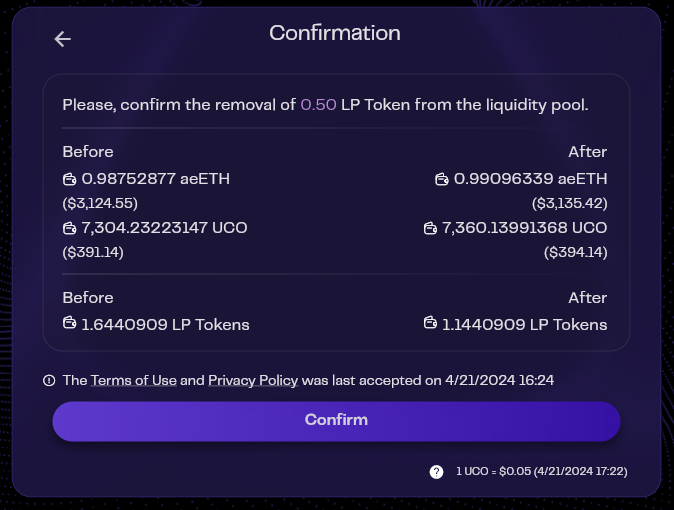
Step 2: Finalizing Liquidity Removal: Confirmation and Validation Steps
After you submit the liquidity removal form by clicking the "Remove liquidity" button, you will be directed to a confirmation screen. This screen serves a critical role in the liquidity removal process, enabling you to:
- Balance Verification: Check your account balances before and after liquidity is removed to understand the impact of your transaction. If the details align with your intentions and you are content with the proposed setup, proceed by clicking on the "Confirm" button to move forward in the process.
Wallet Validations for Liquidity Transactions
Transaction Confirmation: You will need to approve 1 transaction.
Transaction Address: Upon successful completion of this transaction, you will be provided with the address. This address allows you to verify the transaction on the blockchain, ensuring transparency and security in your operation.