Archethic's CLI
Developers like to use terminal applications to speed up their productivity, therefore Archethic have also its own command line interpreter is available to make interaction with the Blockchain easier for power users.
This tool helps you to connect to your decentralized wallet (keychain), manage it, send transactions, etc.
Installation
Download a pre-compiled binary or package from the releases page.
Or install it with go:
go install github.com/archethic-foundation/archethic-cli@latest
Or just build it yourself (requires Go 1.18+):
git clone https://github.com/archethic-foundation/archethic-cli.git
cd archethic-cli
go build .
By default the CLI works as TUI (terminal user interface) application allowing the application to be interactive.
When launching the Archethic CLI you will access to the main menu that allows you to select an action.
- Generate an address
- Build and send a transaction
- Manage keychains (and send transaction keychains)
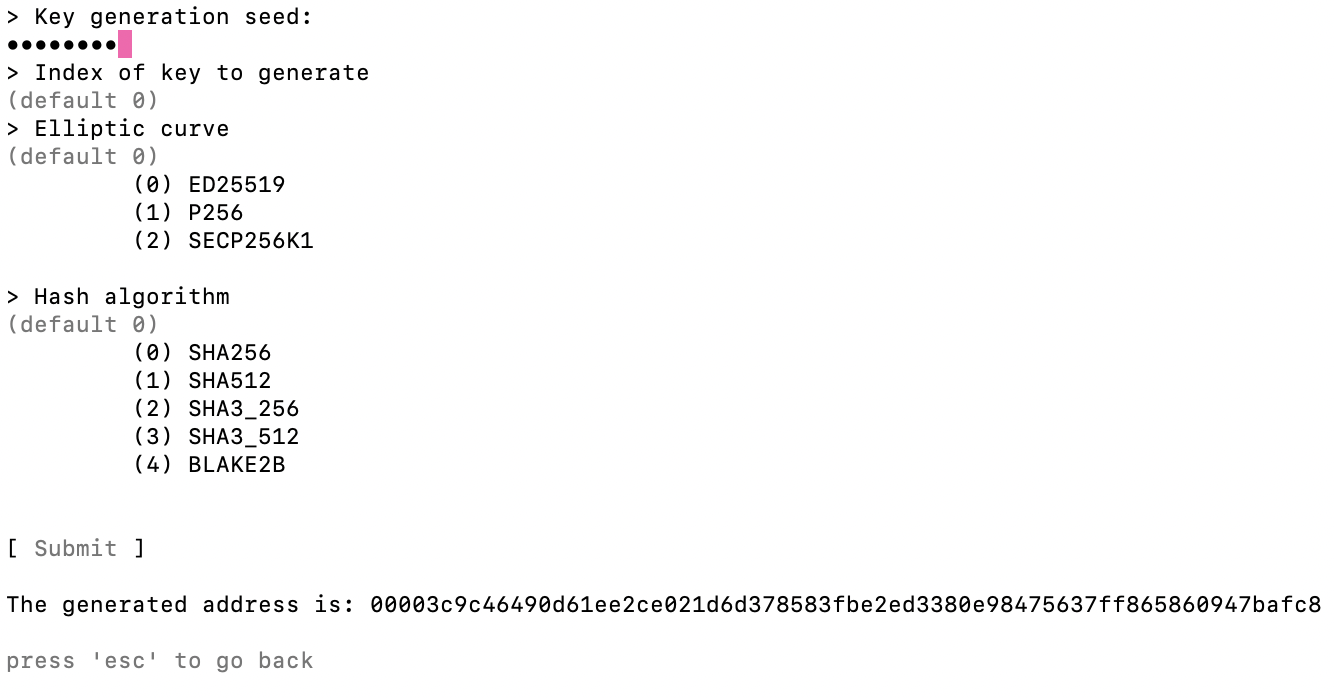
Generate address
This generate address page allows you to get the address for a given seed, a specific index and with a given elliptic curve and hash algorithm. The default values are probably fine for elliptic curve and hash algorithm.
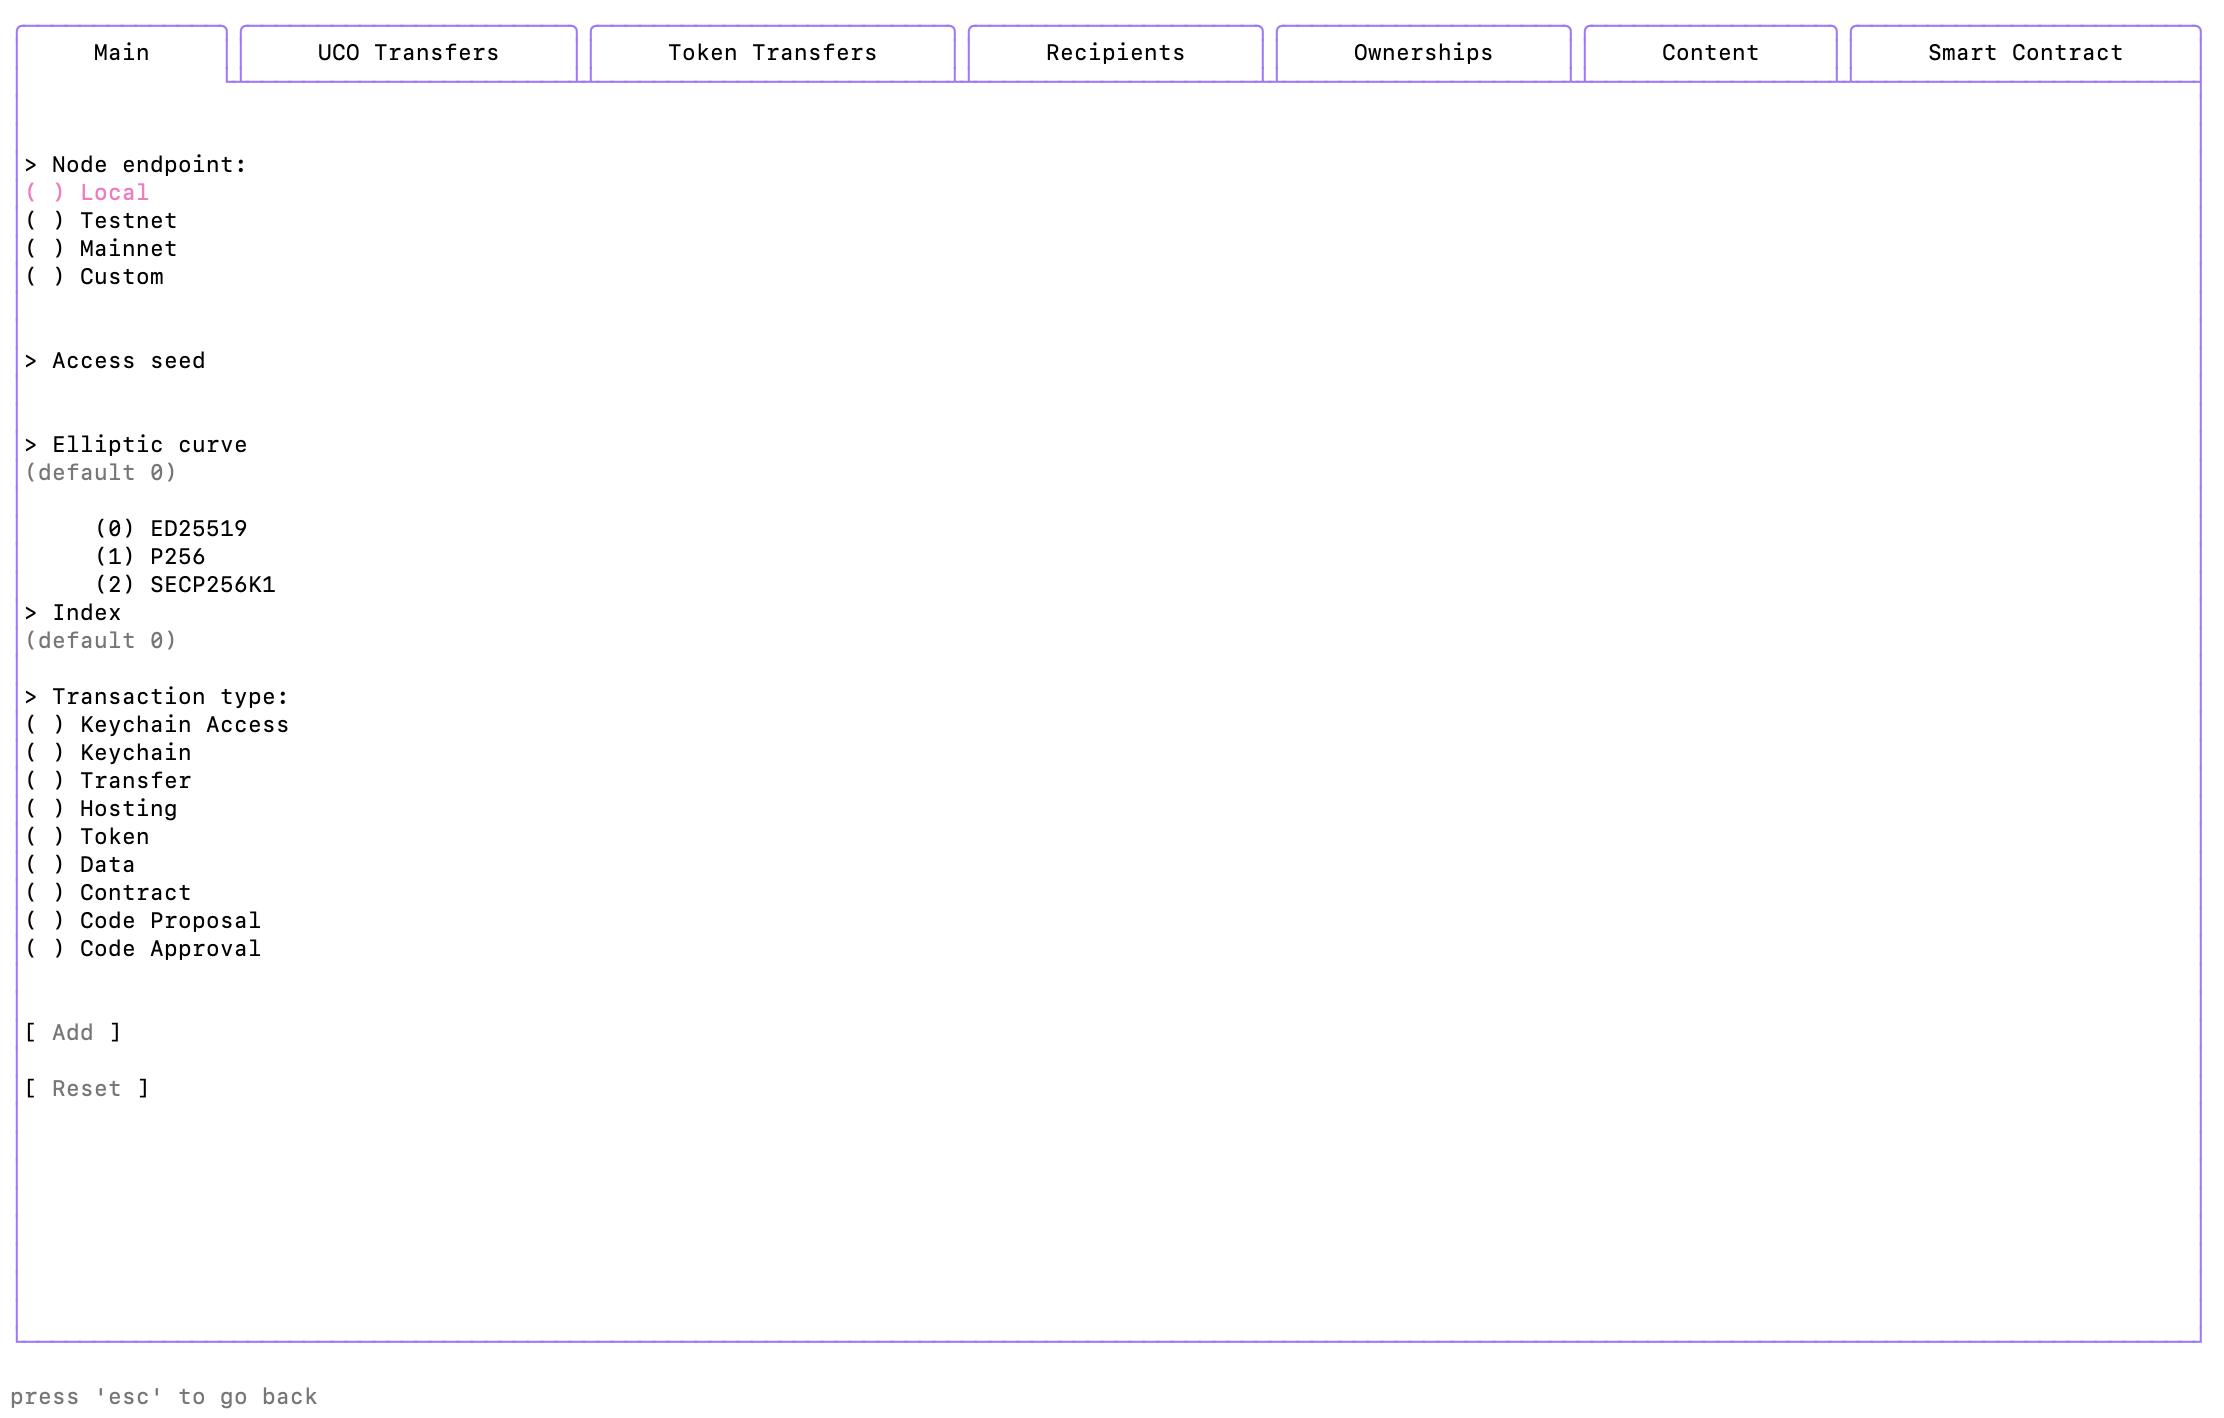
Build and send transaction
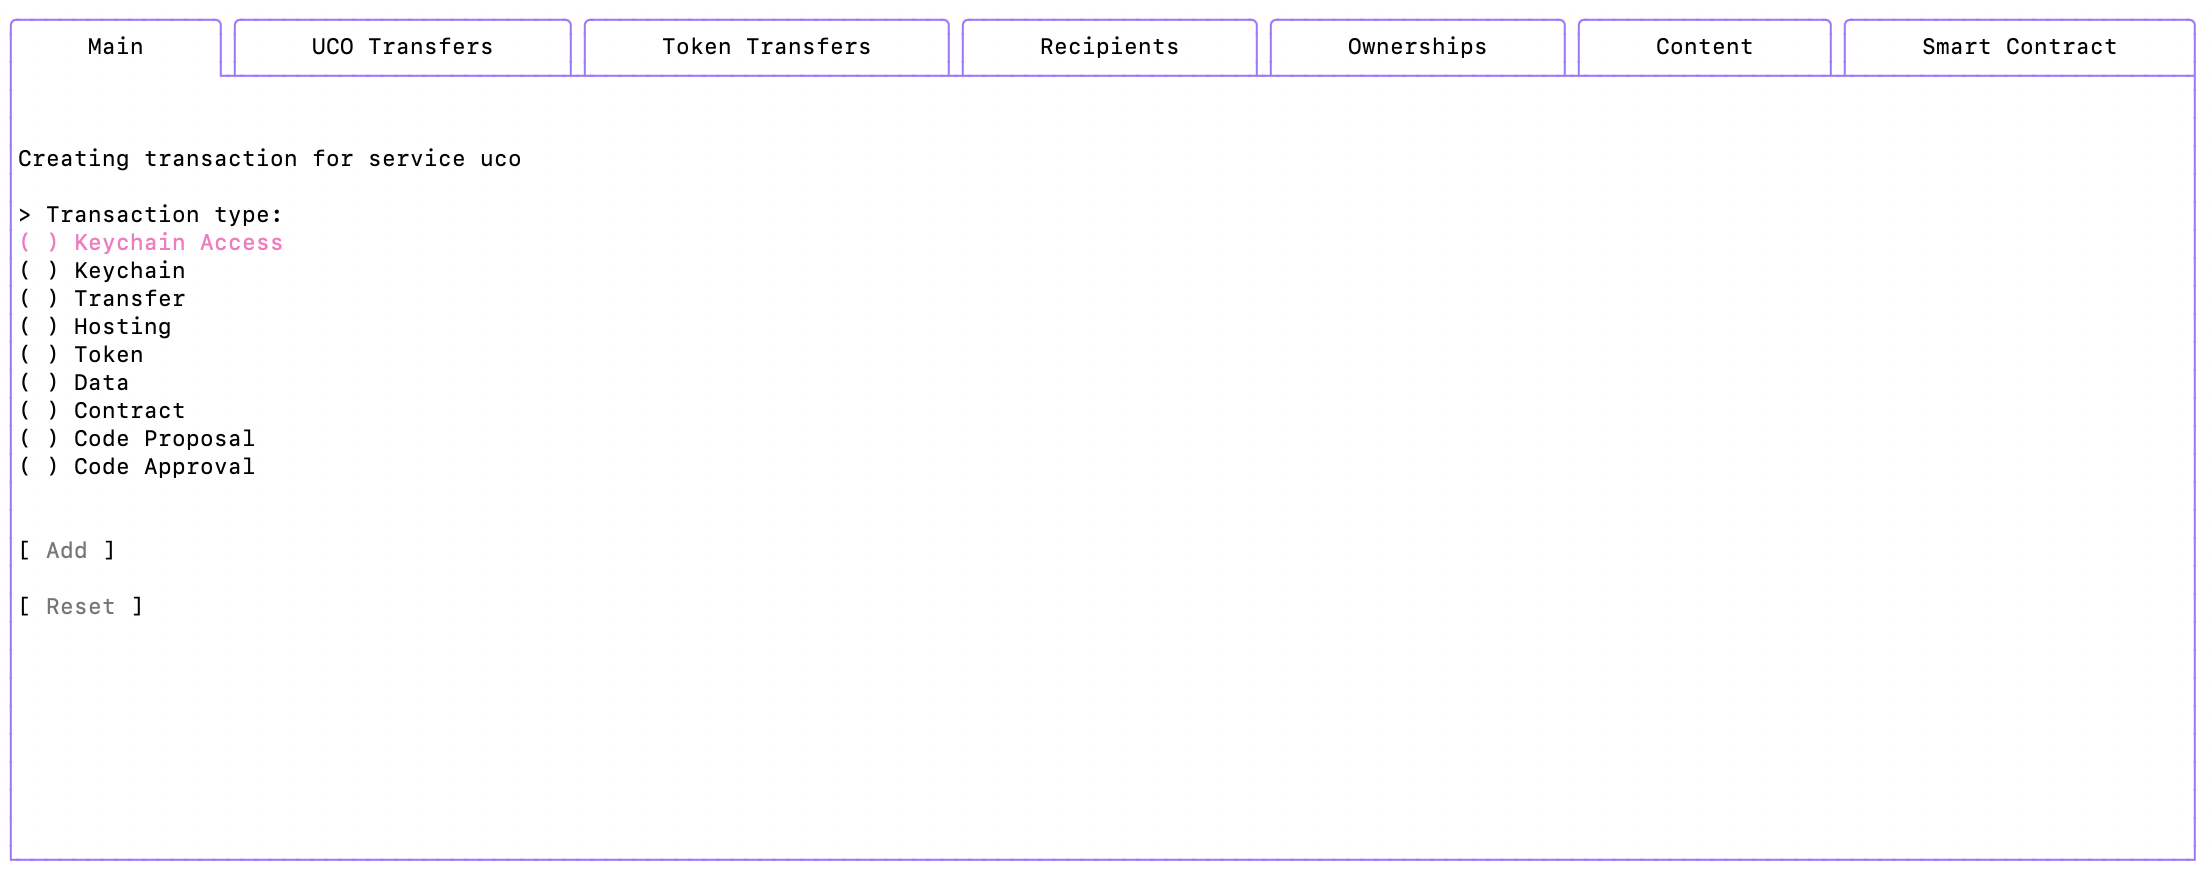
This menu allows you to create a transaction. There are 7 tabs you can navigate to, by using the left and right arrows of your keyboard in order to configure your transaction.
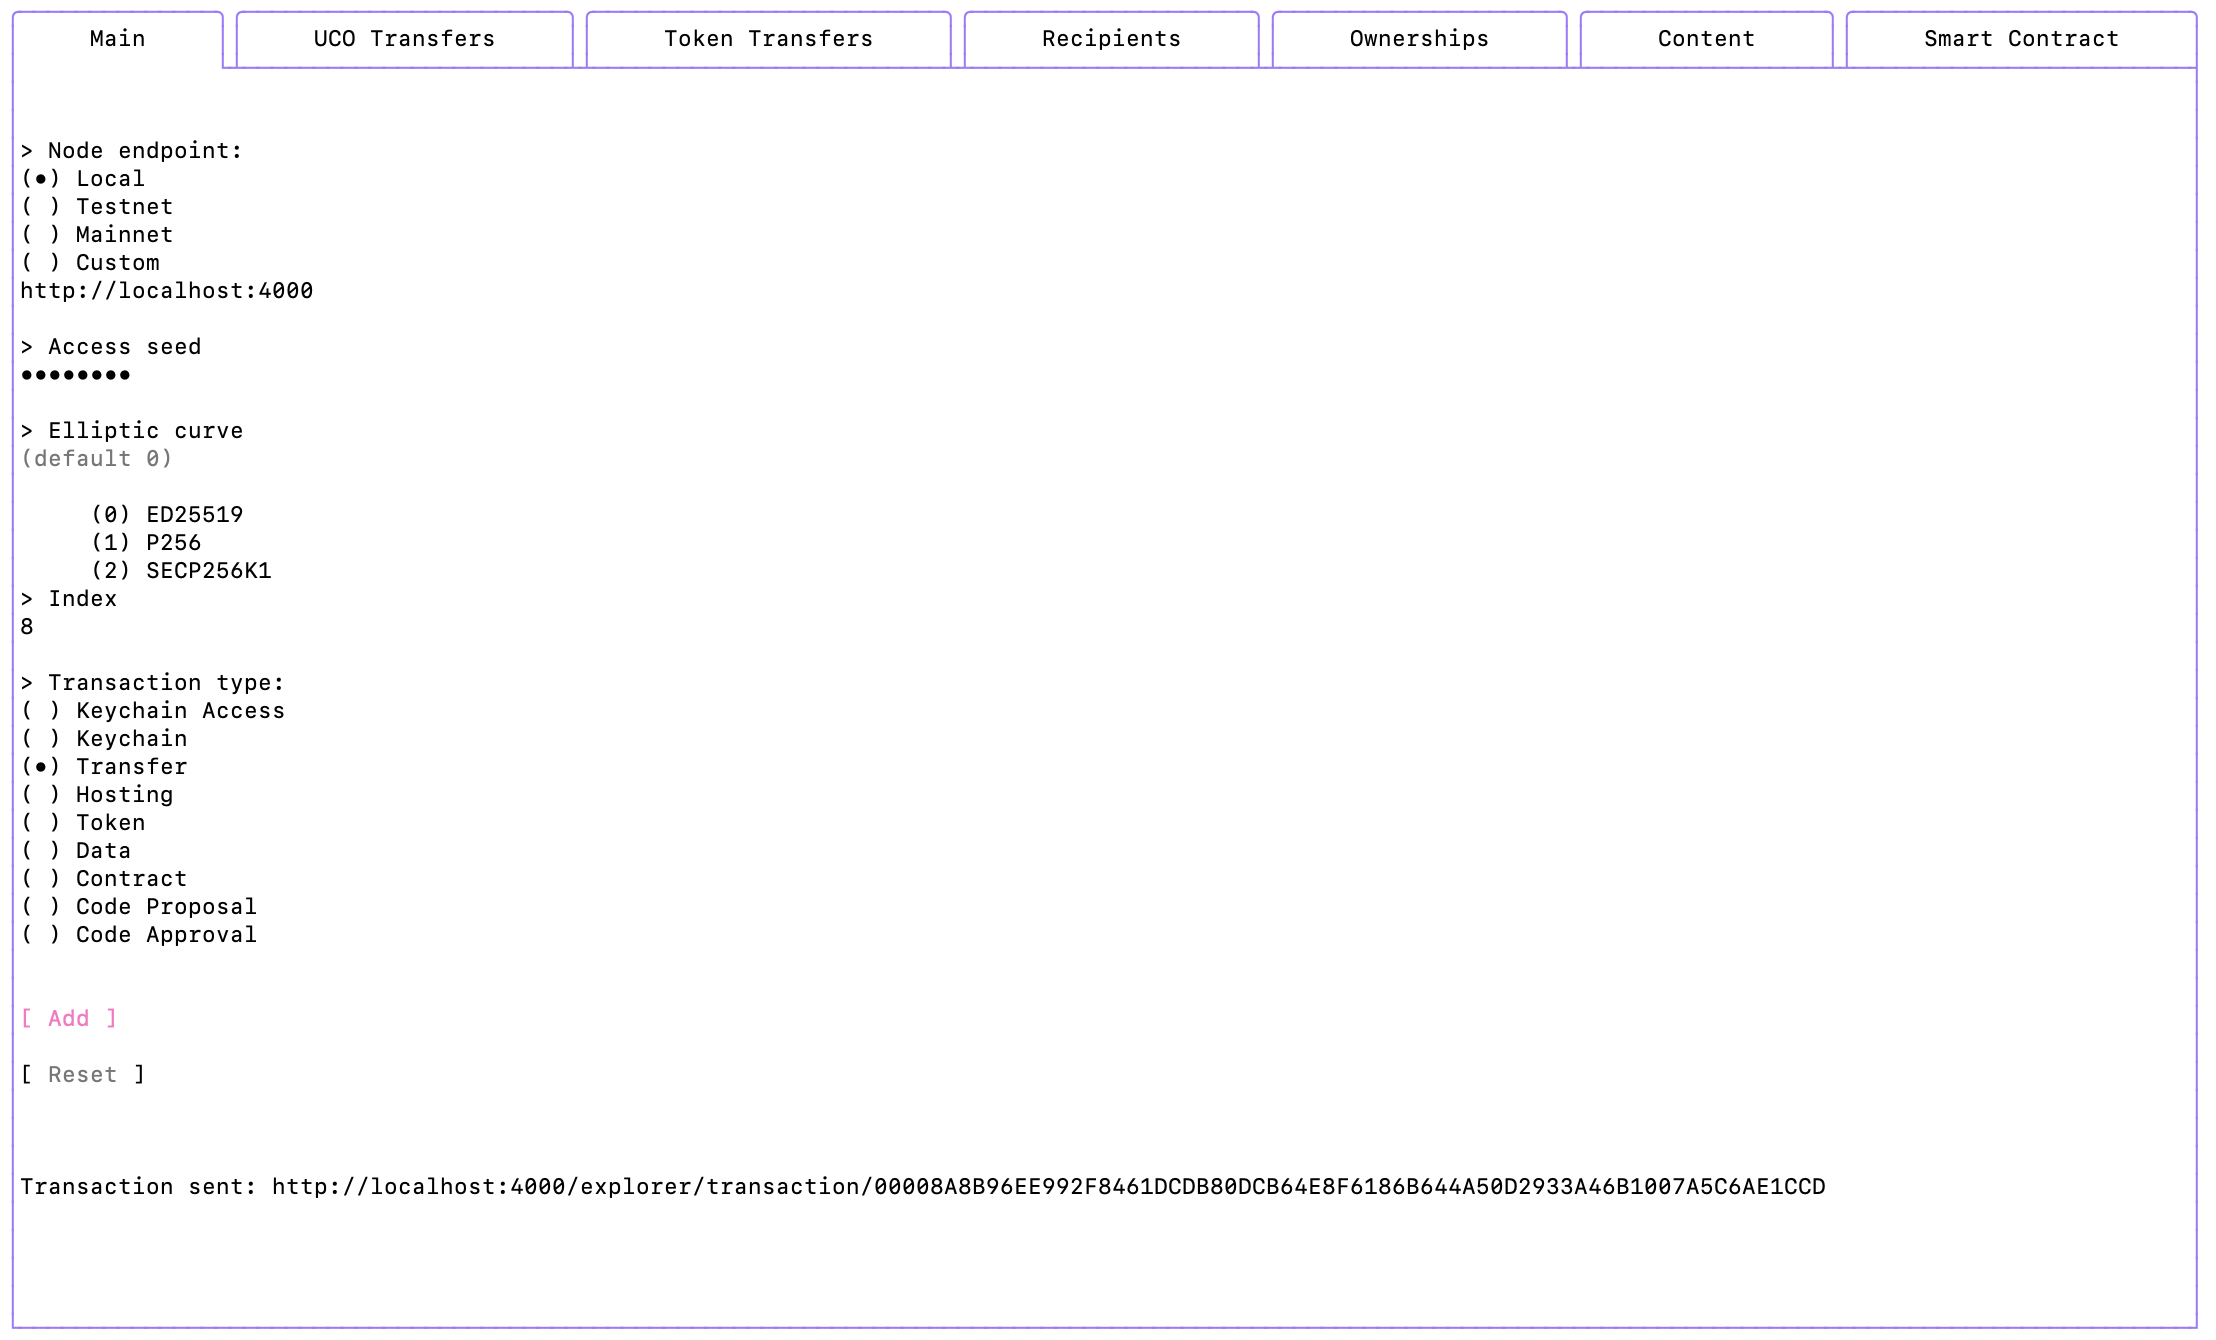
This is where you set the main info (like the endpoint, the seed, the transaction type…) and send the transaction. By selecting one of the default node endpoint you will have the URL to send your transaction automatically set. You will need to enter your seed.
The index of the transaction will be set automatically (based on the index of the last transaction). Select one of the transaction type, regarding the type you select, you might have specific information to provide to your transaction (for example a transaction of type Transfer needs a UCO transfer or a token transfer.
The Add buttons sends the transaction and the Reset button clears the form.
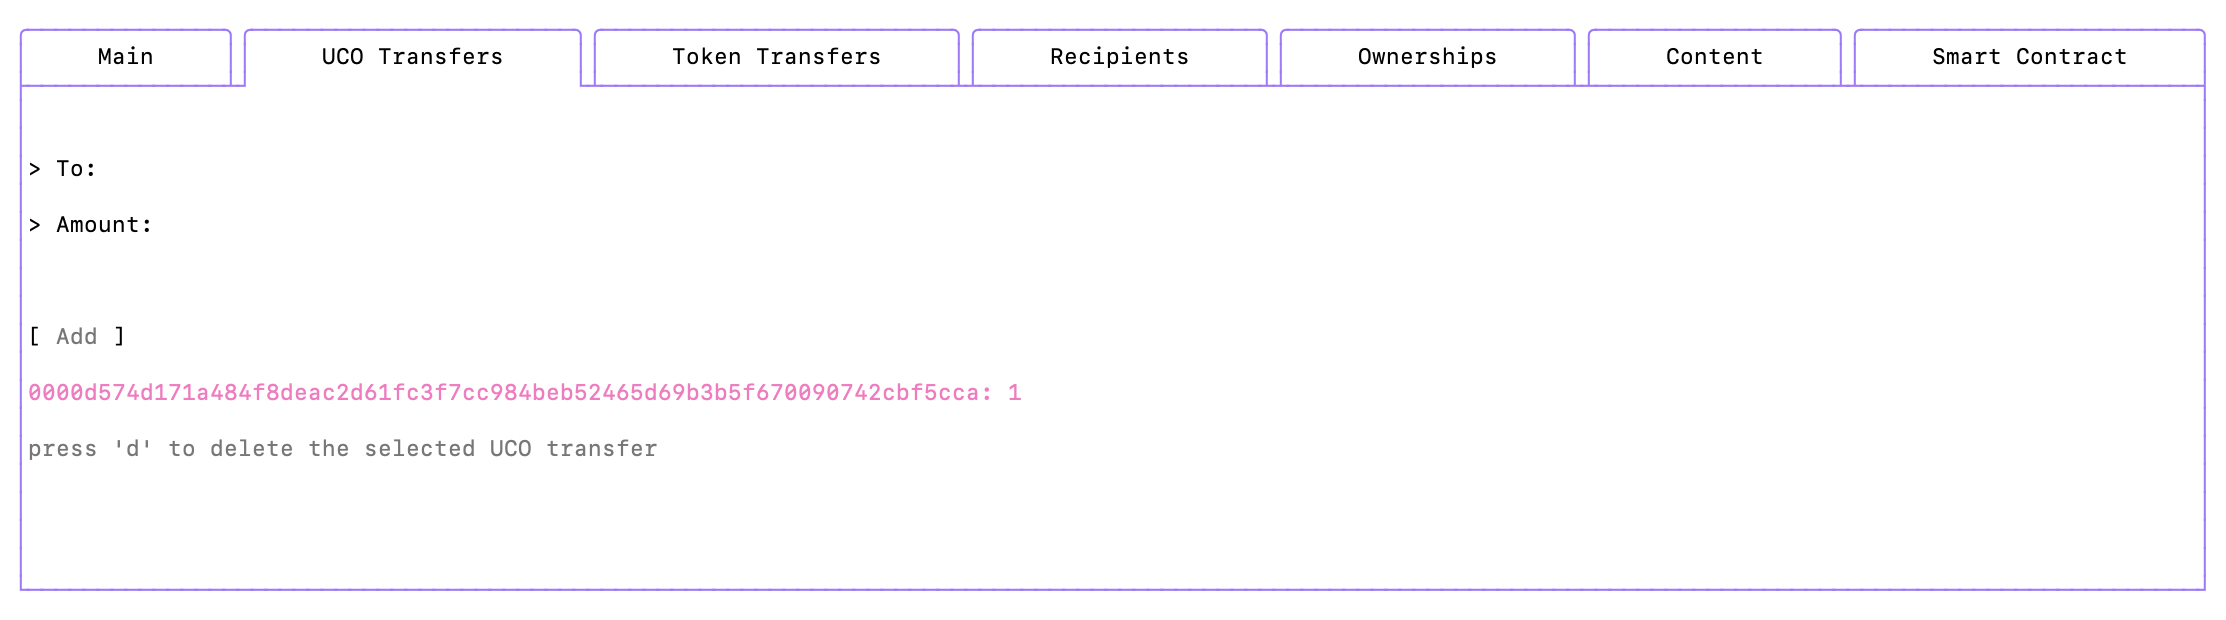
UCO transfers
This tab allows you to create UCO transfers in your transaction. Type a valid address and an amount and press the Add button.

You will then have a list of configured UCO transfers. Using the up and down keys, you can highlight a configured transfer and delete it by typing d.
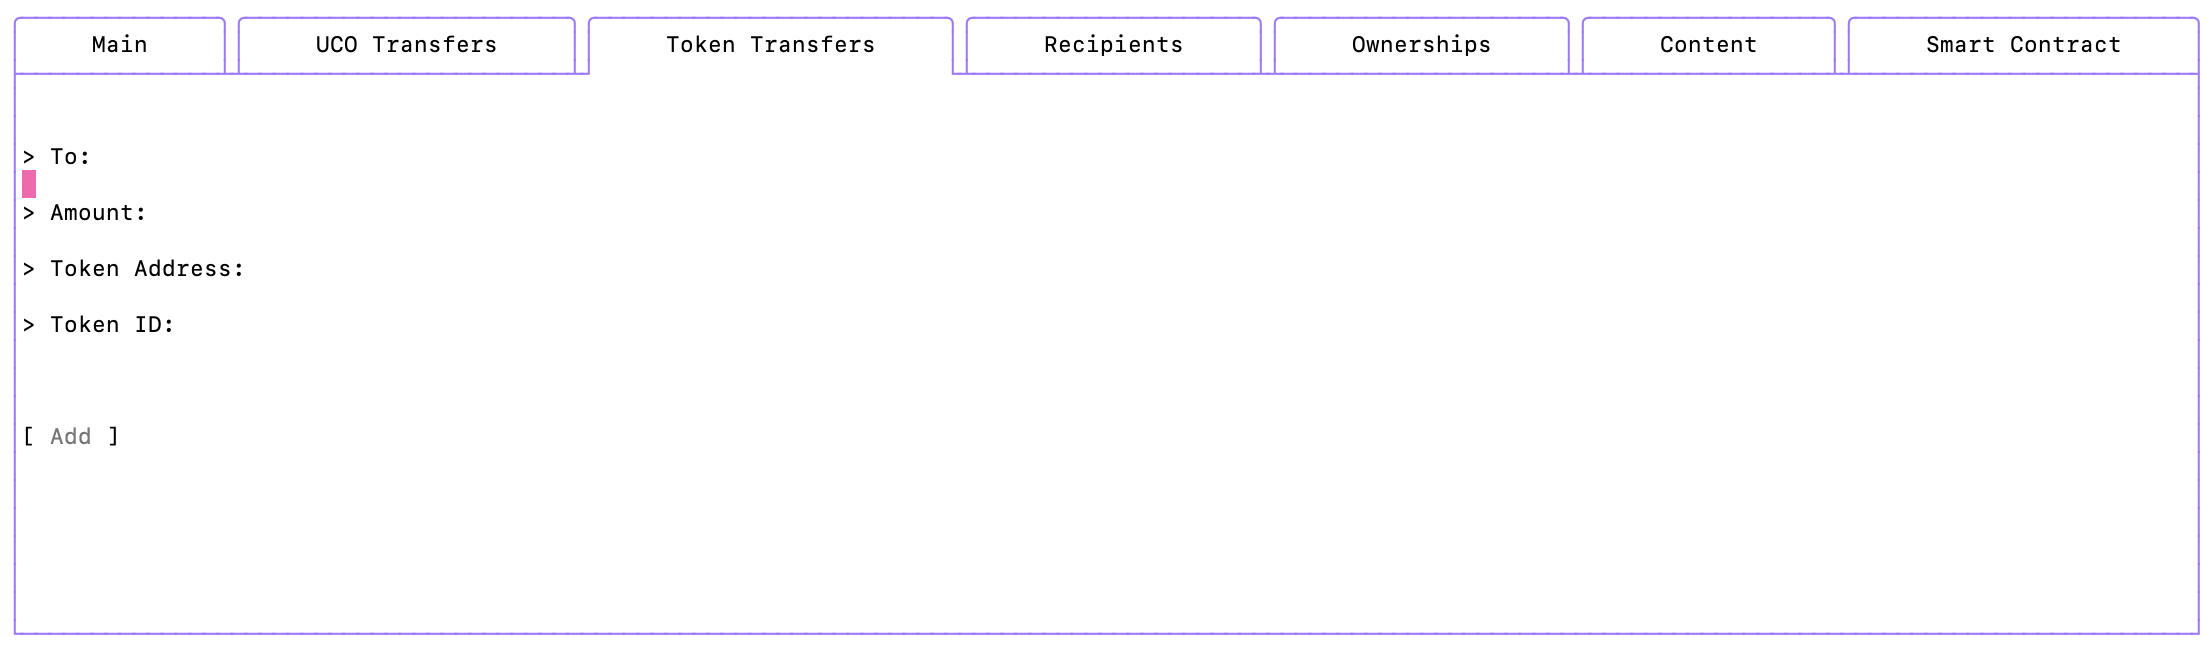
Token transfers
The same logic applies to the token transfers tab. But you need to specify a token address and an token id.
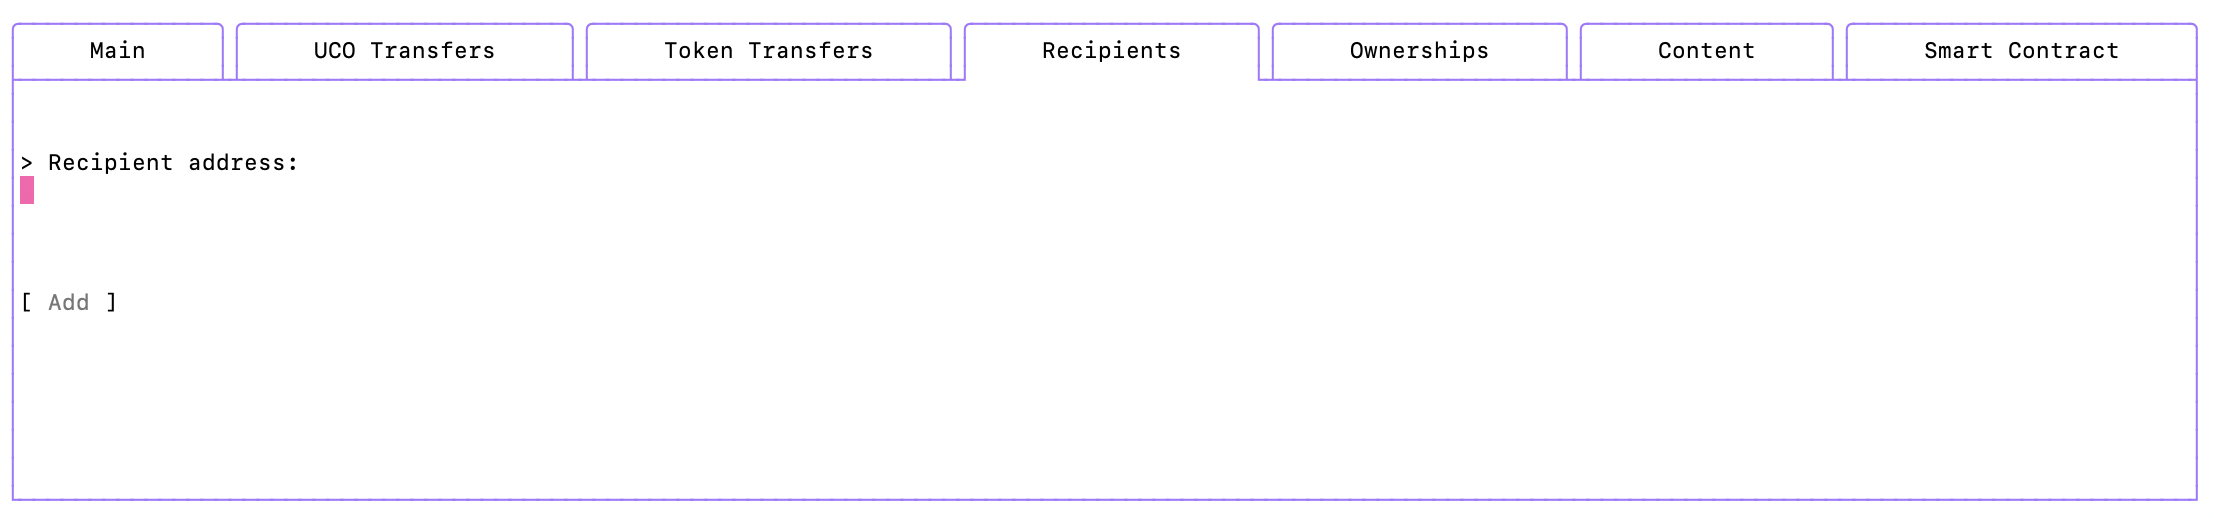
Recipients
The same logic also applies to the recipients tab which targets smart contract executions.
Ownerships
The ownership tab contains the information about the access you give to execute your transaction.
This will be needed if you want to create a smart contract.
You can define several ownerships. Each ownership has
- a secret
- a list of authorization keys that get access to the secret.
At least one of the ownership must have the seed as a secret and the storage nouce public key as an authorization key.
You can press the Load Storage Nounce Public Key to automatically set the authorization key with the value of the storage nonce public key. (ie. for smart contract's creation key delegation)
You must have selected an endpoint in the main tab in order to load the storage nounce public key of the network you target.
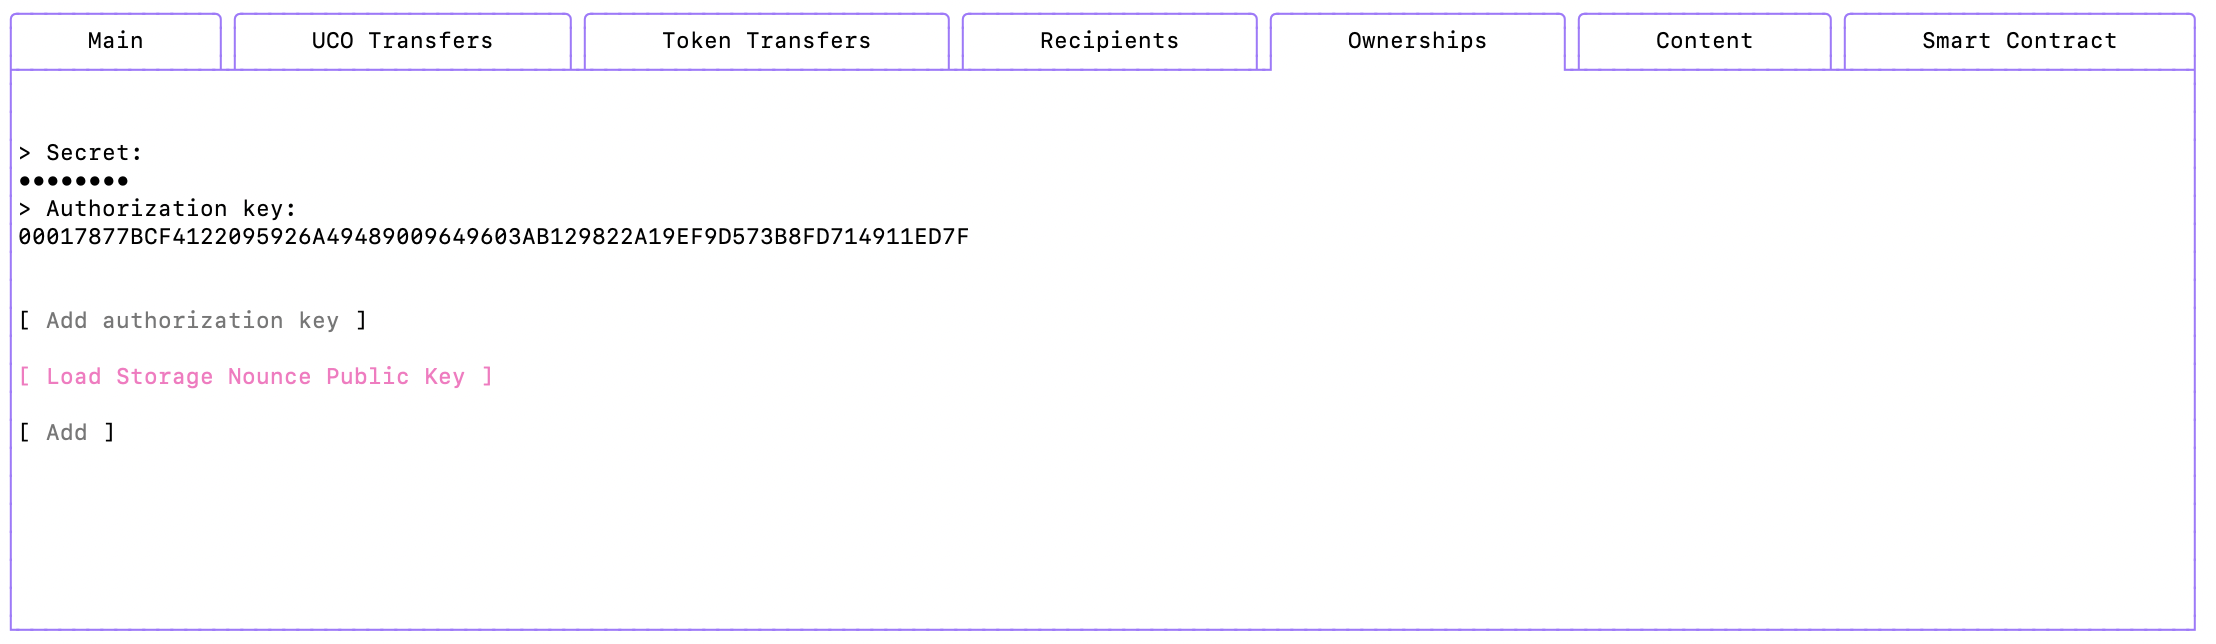
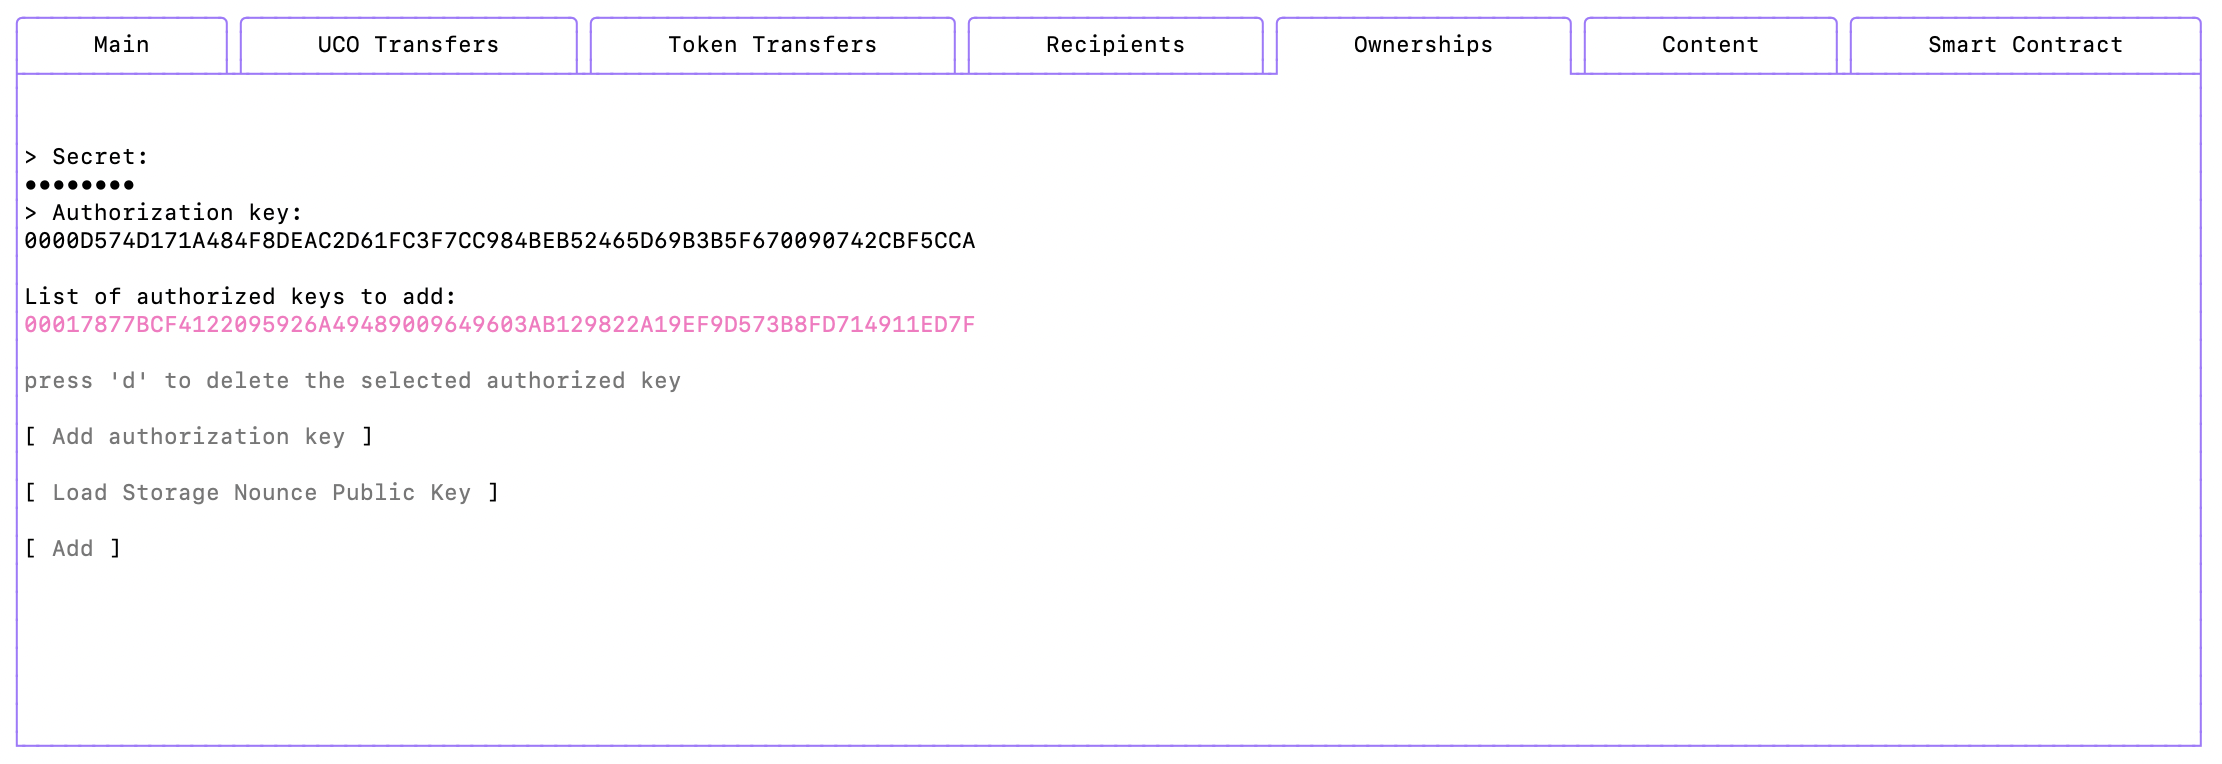
Pressing the Add authorization key allows you to add a new authorization key that will get access to the secret. Once added to the list of autorized keys, you can highlight a key and press d to delete it.
Once you’re done with the configuration, you can press the Add button to add the ownership configuration to the transaction.
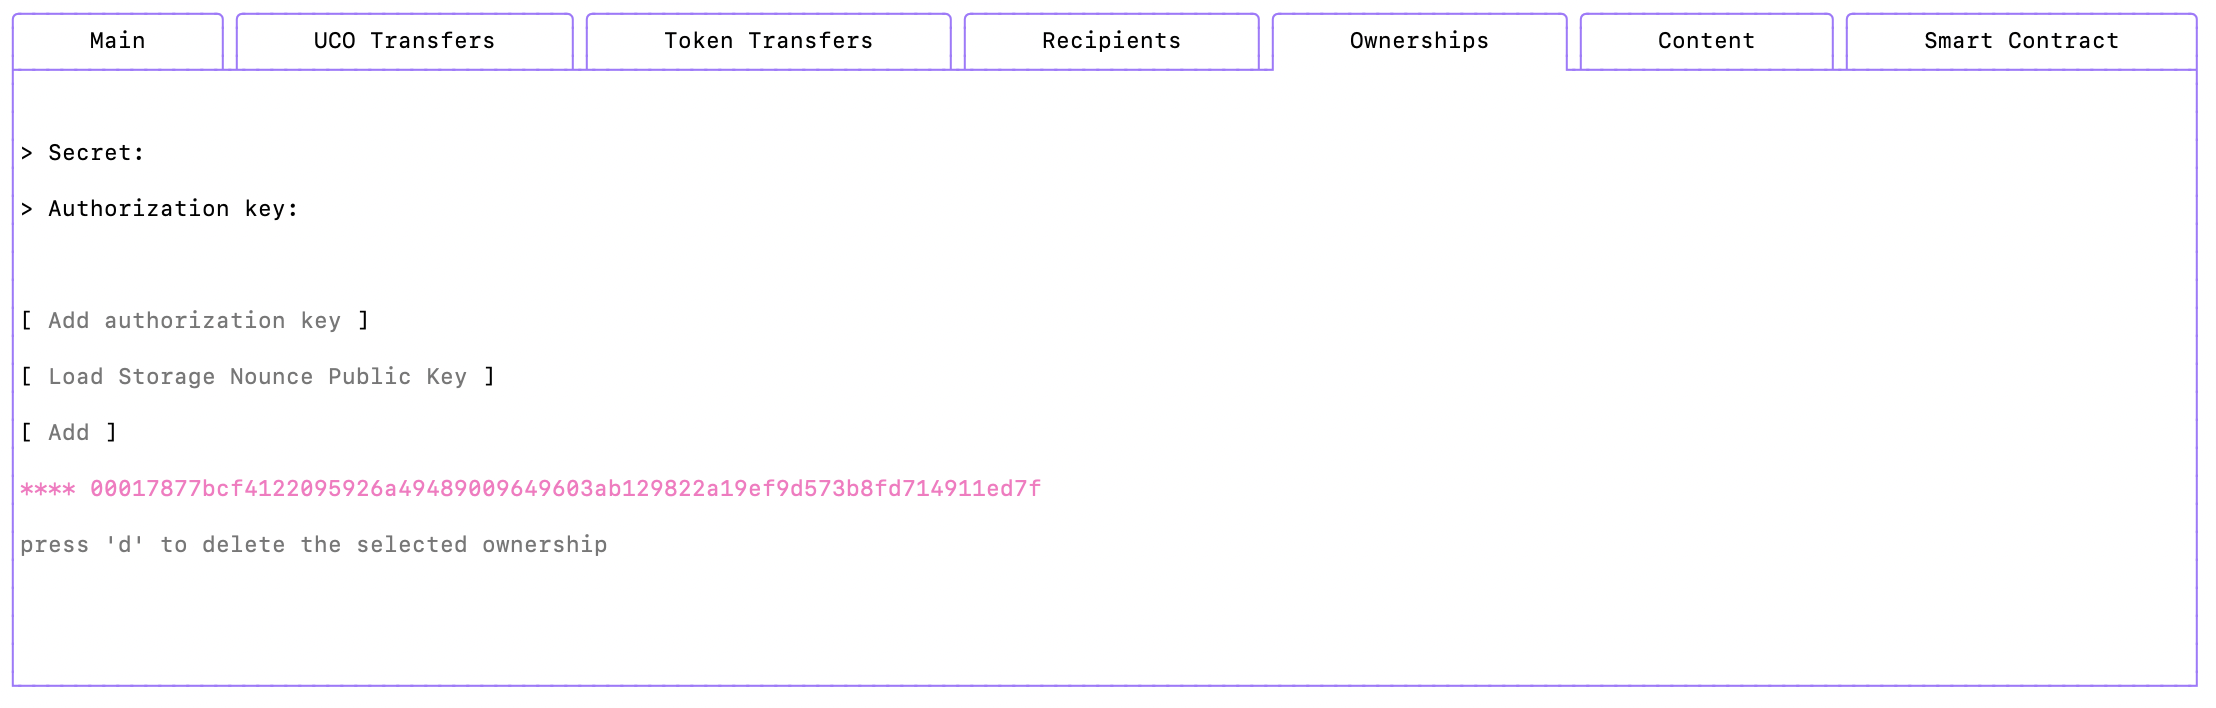
And here also, if you want to delete a configured ownership, you can highlight it and press d.
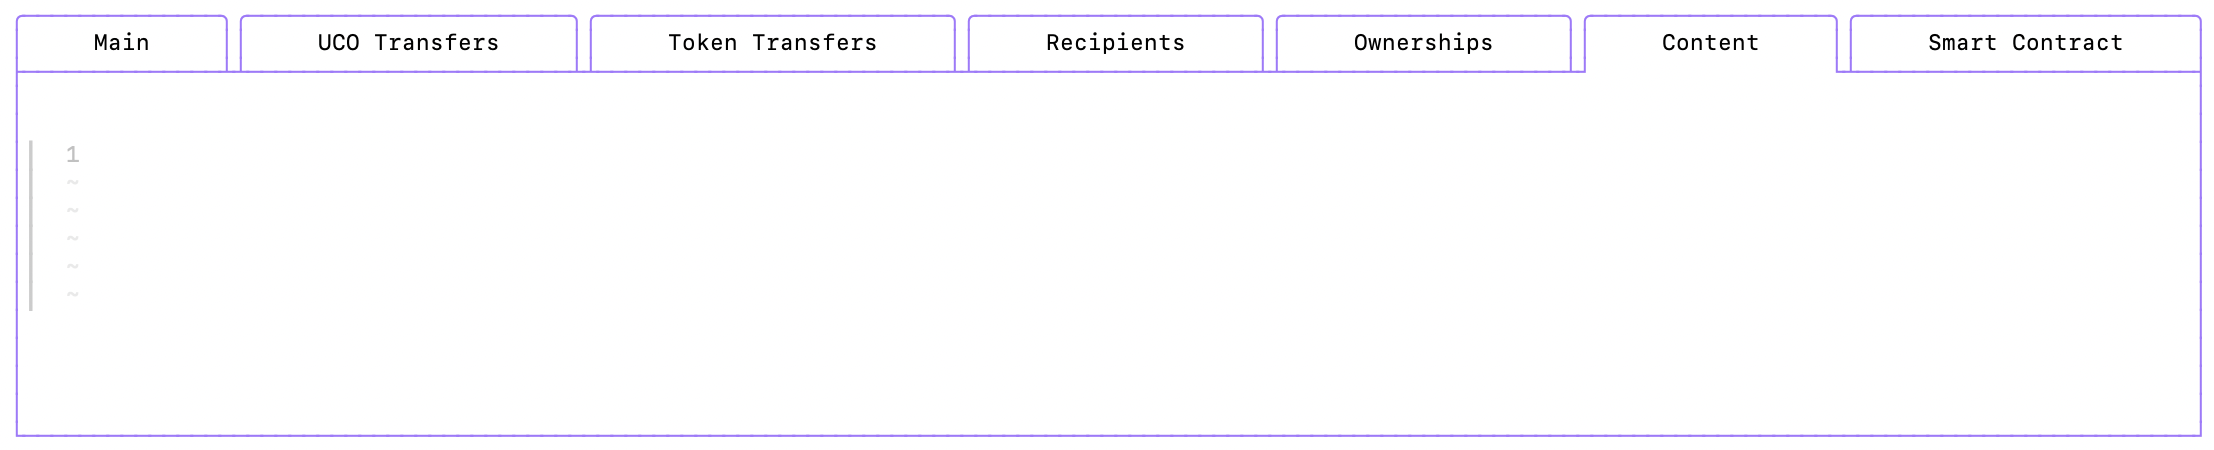
Content
The content tab allows you to set the content of the transaction. Start typing to enter the edit mode of this tab and press esc if you want to exit the edit mode and navigate to another tab.
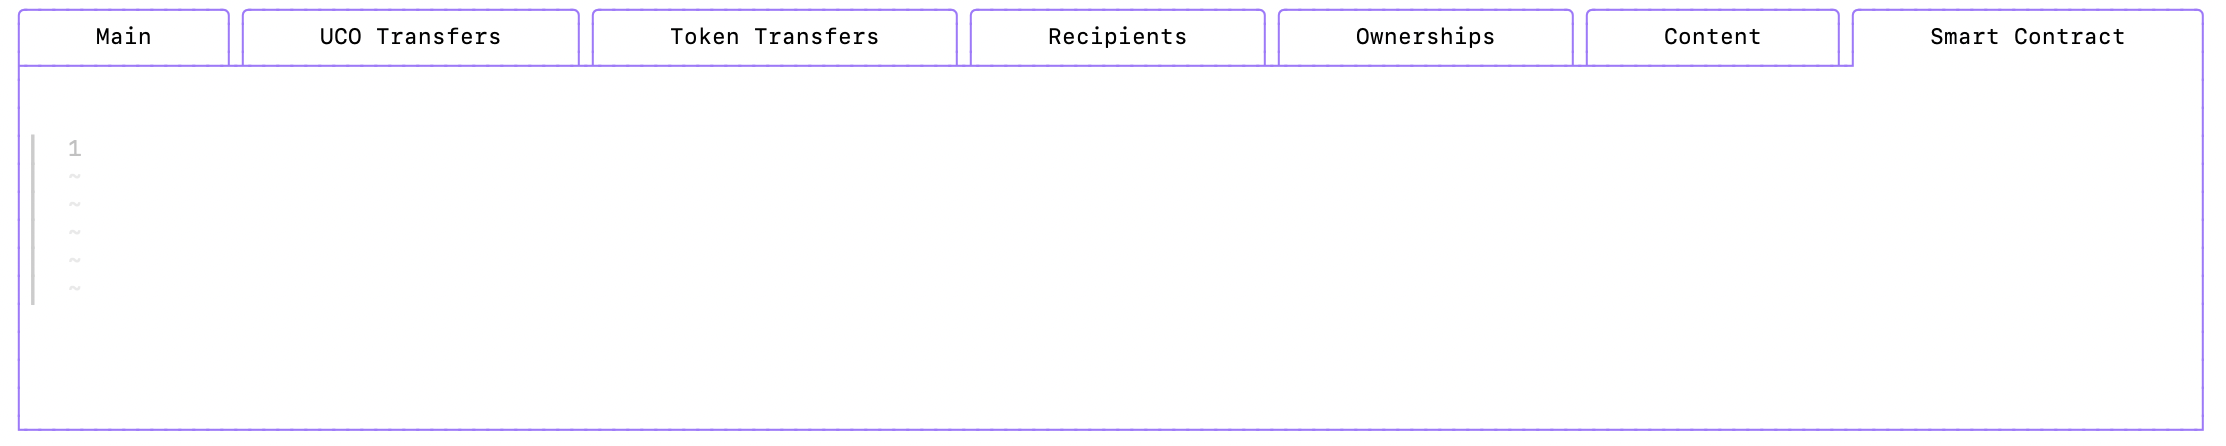
Smart contract
The smart contract tab allows you to set the smart contract of the transaction. Start typing to enter the edit mode of this tab and press esc if you want to exit the edit mode and navigate to another tab.
Sending the transaction
When you’re done configuring the transaction, go back to the main tab and press the Add button.
Keychain management
The keychain management menu allows you to
- create a keychain with a given seed
- access a keychain
- add and remove services from a keychain
- send a keychain transaction for a specific service
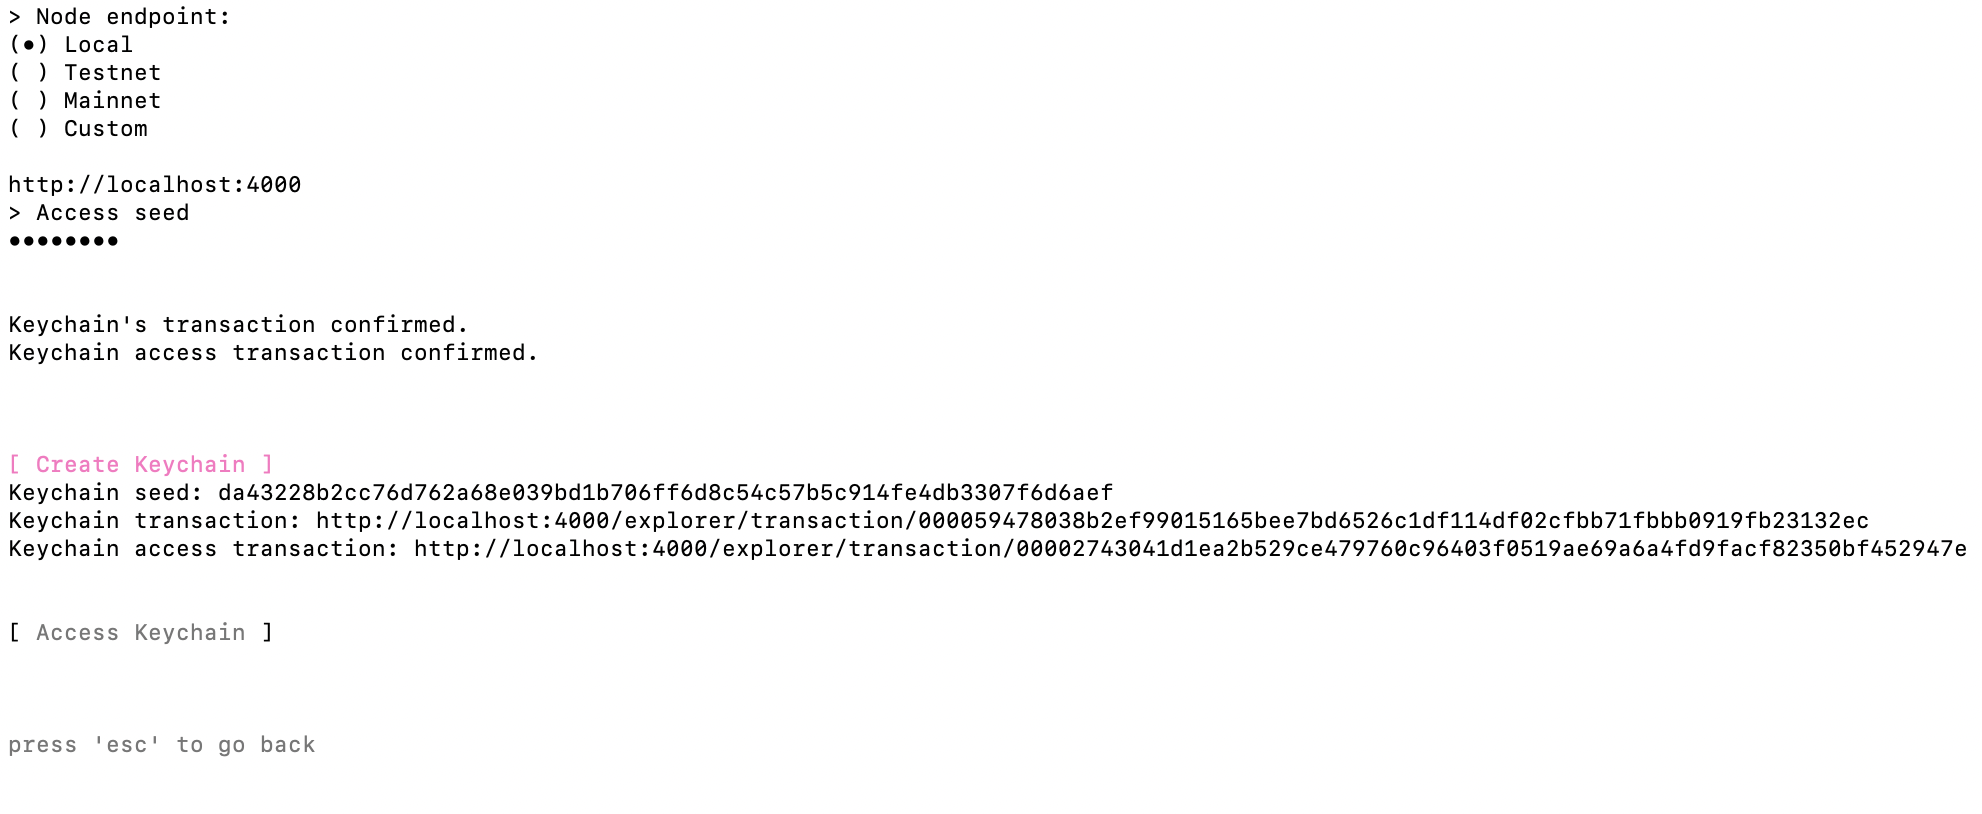
In any cases you will need to start by selecting the endpoint you want, that will automatically feed the URL of the endpoint. Then specify your access seed.

Creating a keychain
If you press the Create keychain button, a new keychain will be created. And the seed you provided will be used to access it.
Accessing a keychain
Pressing the Access keychain button will give you access to the list of services associated with your keychain (one default uco service has been created).
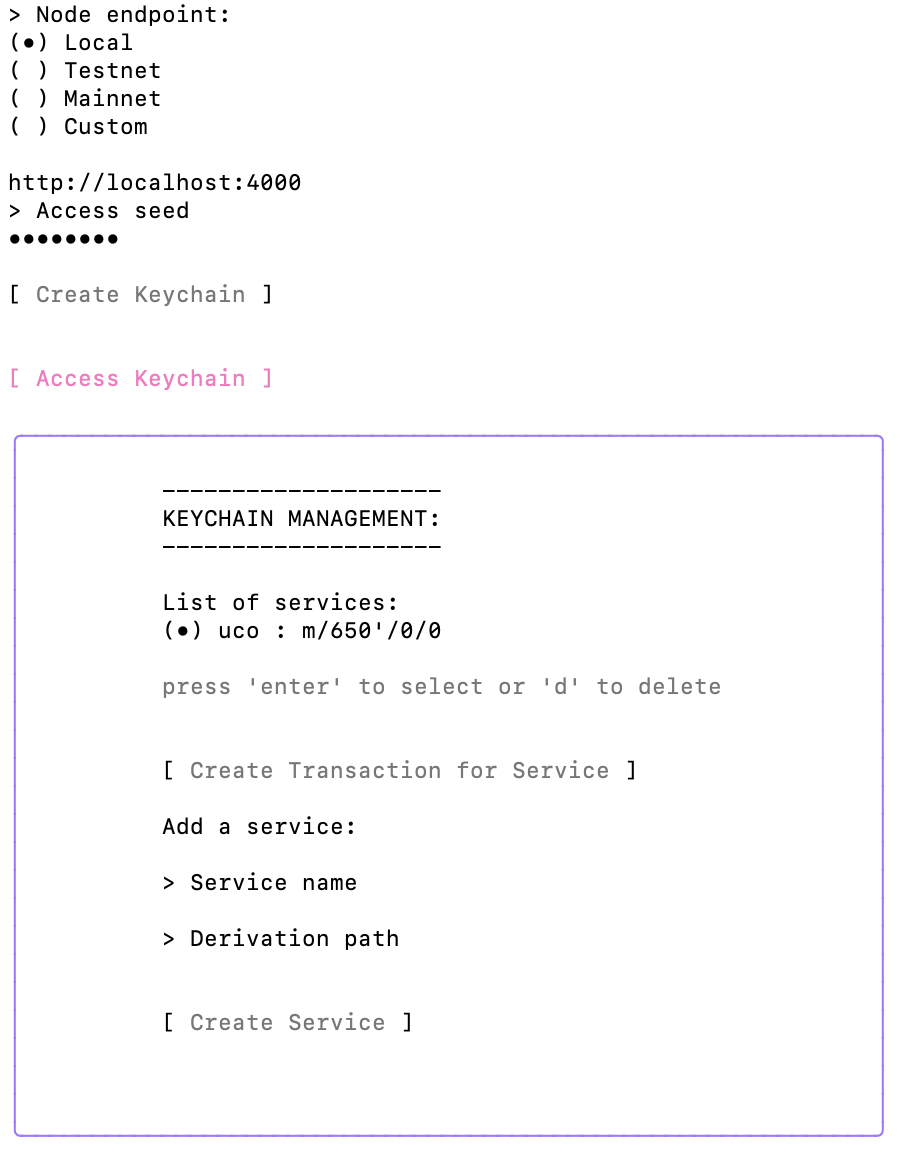
Adding / removing a service
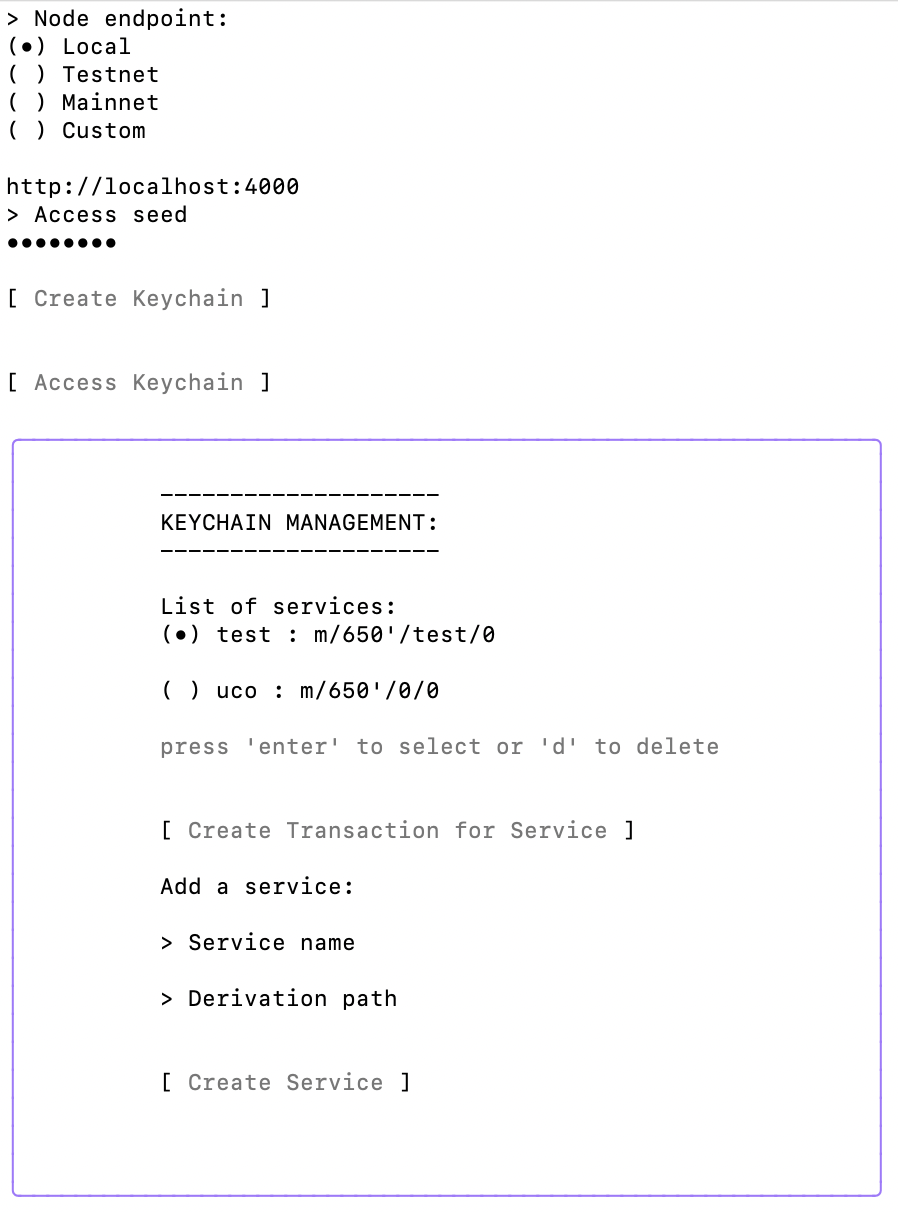
If you go down to the service name field you can type a new service name and a default derivation path will be created. If you then press the Create Service, your new service will be displayed in the list of services.
If you highlight a service and press d the service will be deleted.
Create a transaction for a service
If you highlight a specific service and press enter the highlighted will be selected.
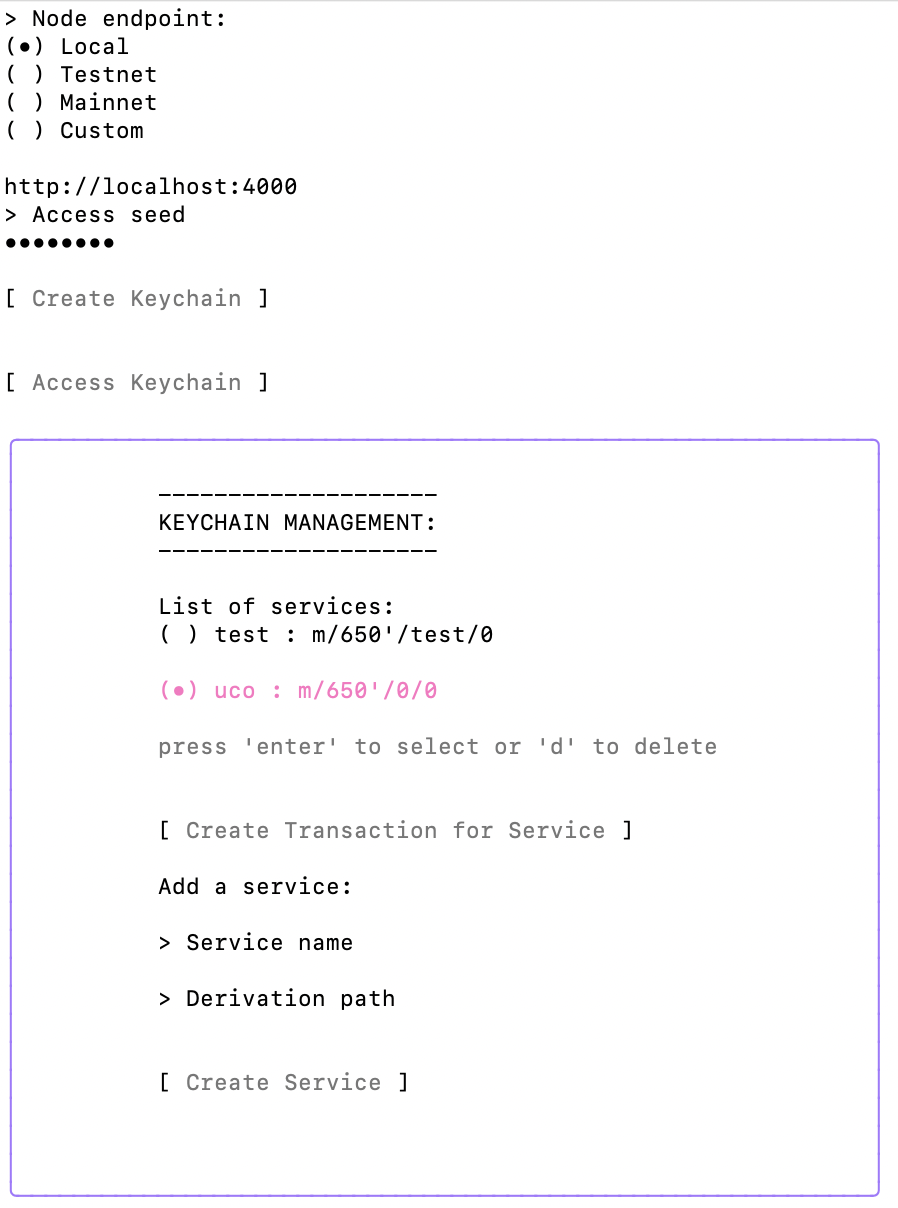
If you then press the Create Transaction for Service button, you will get a new menu to create a transaction for the selected service.
The mechanism to configure a keychain transaction for a service is the same as the one for a transaction (described above). Only a few configuration are not possible (like the endpoint, the seed, the index and the elliptic curve).
CLI - Archethic Command Line Interpreter
It is also possible to call the archethic cli tool using the command line.
For details of available commands, you can
- consult the readme of the corresponding github project.
- display help with the command
--help.

Contribution
If you like this product and wish to contribute to its development, please visit our Github Page
We are welcoming contributions in any forms (code, issues, documentation, ideas, question, etc.)