Smart Contracts Playground - Build
Let's create a small smart contracts that reacts to two different triggers. We'll then be able to test them separately.
@version 1

actions triggered_by: interval, at: "0 * * * *" do
  Contract.set_content "Hello from interval"
end

condition triggered_by: transaction, as: []
actions triggered_by: transaction do
  Contract.set_content "Hello from tx"
end
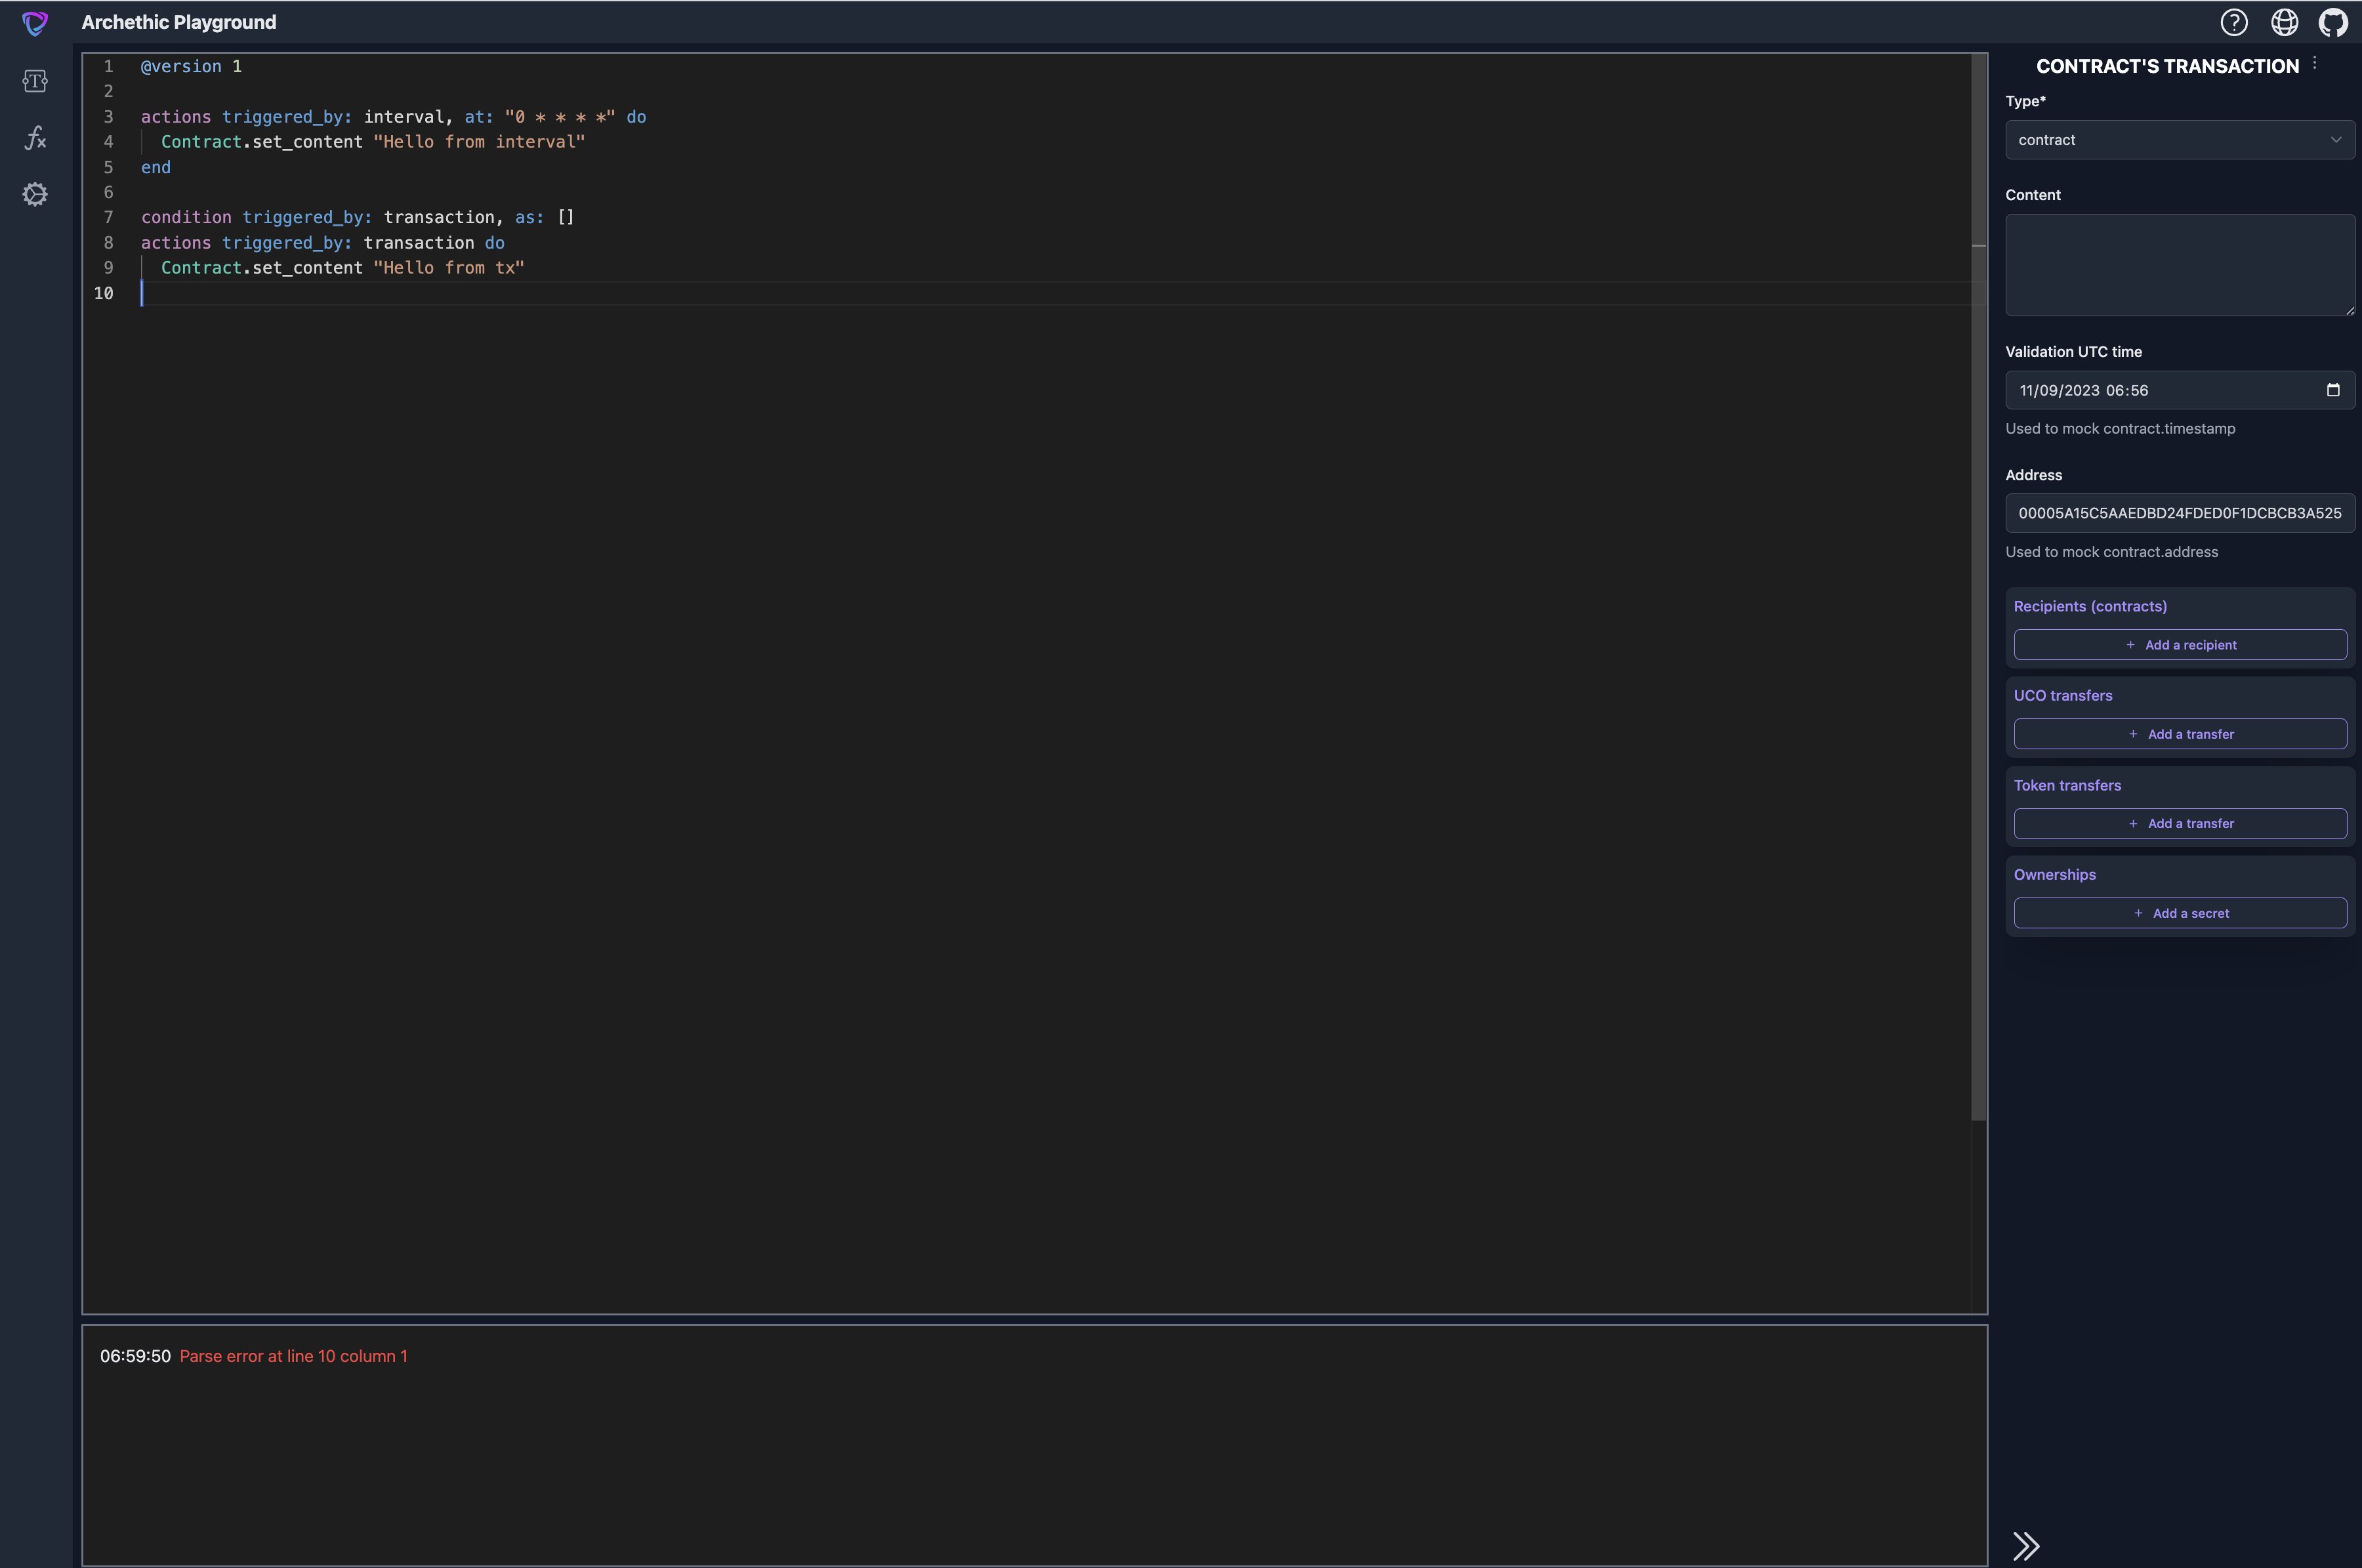
I. Write the contract
Write the code of the smart contract in the text area:

As you write, you might see the console at the bottom reacting with different errors:
II. Test the triggers
To test a smart contract, you need to test all its triggers. We are going to open the trigger panel by clicking on the trigger button:

The trigger panel opens on the left hand side:
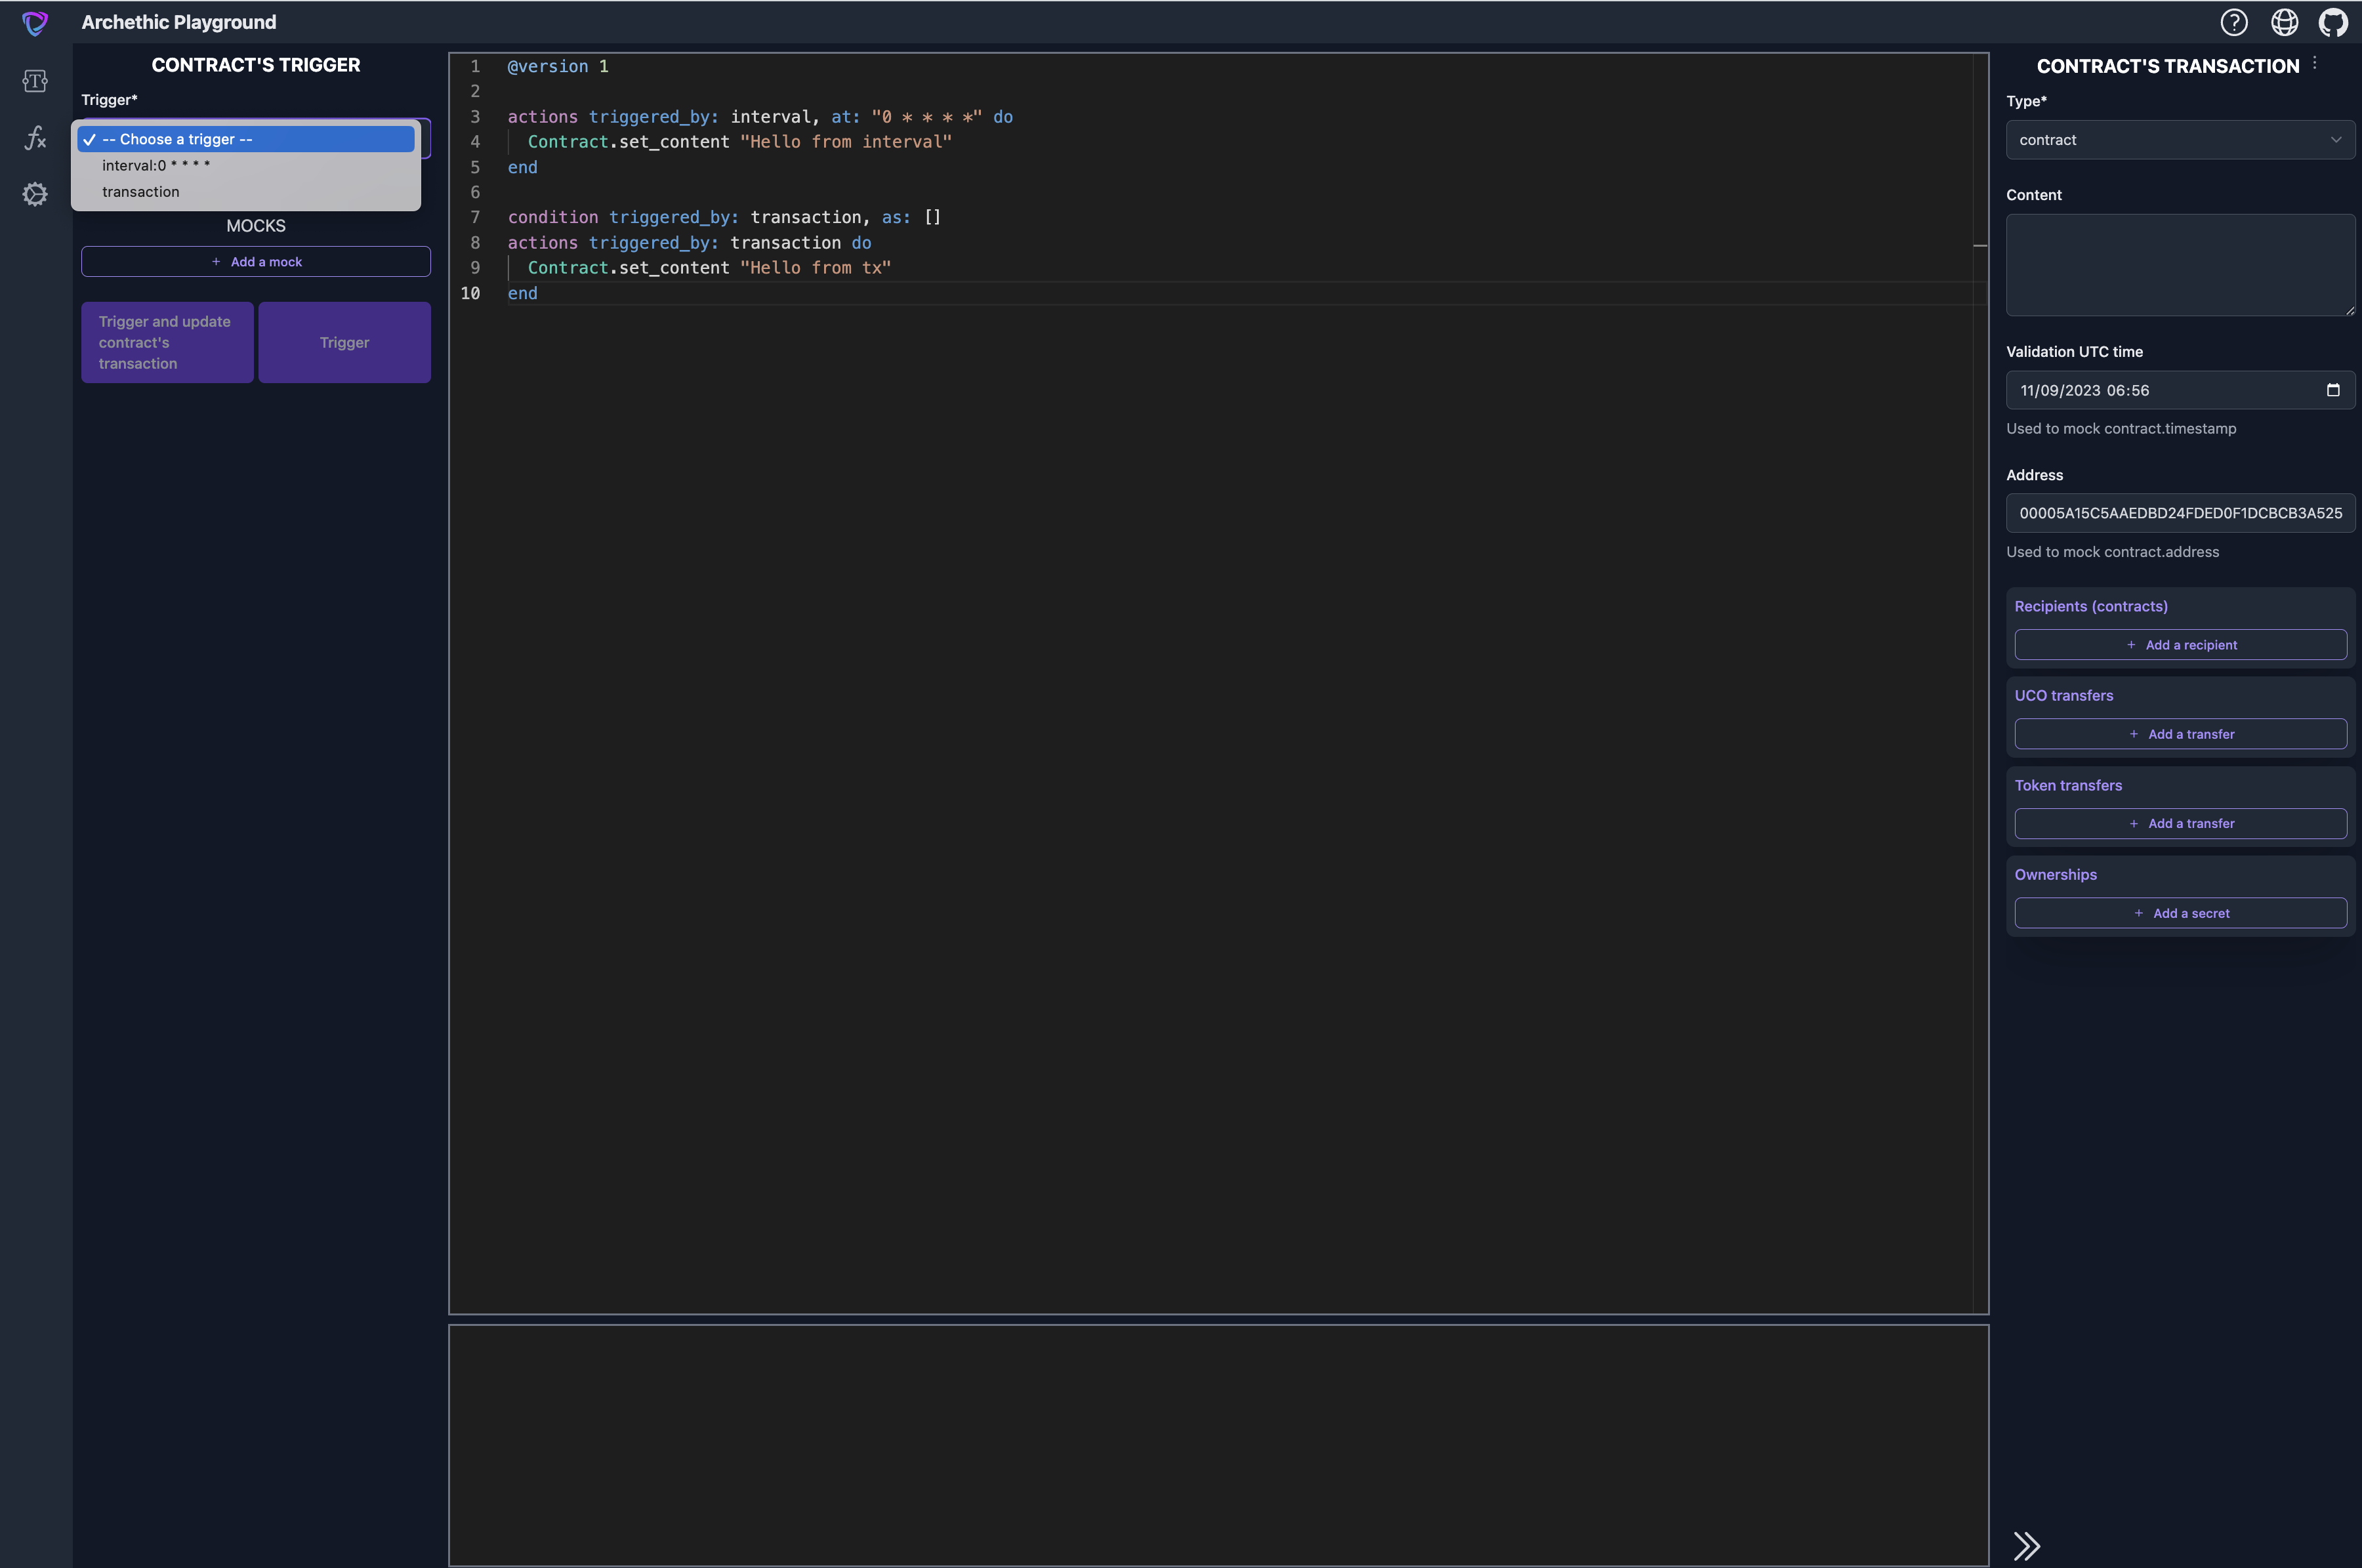
You are now able to select which trigger you want to test, for this contract a selector of two triggers is displayed (as per the contract): You'll also see the mock form that is used to mock the functions that does side-effect.
Test trigger 'interval'
An interval trigger is a contract that triggers automatically at a specific interval. It does not require anything so it's pretty easy to test. Just click on the trigger button.
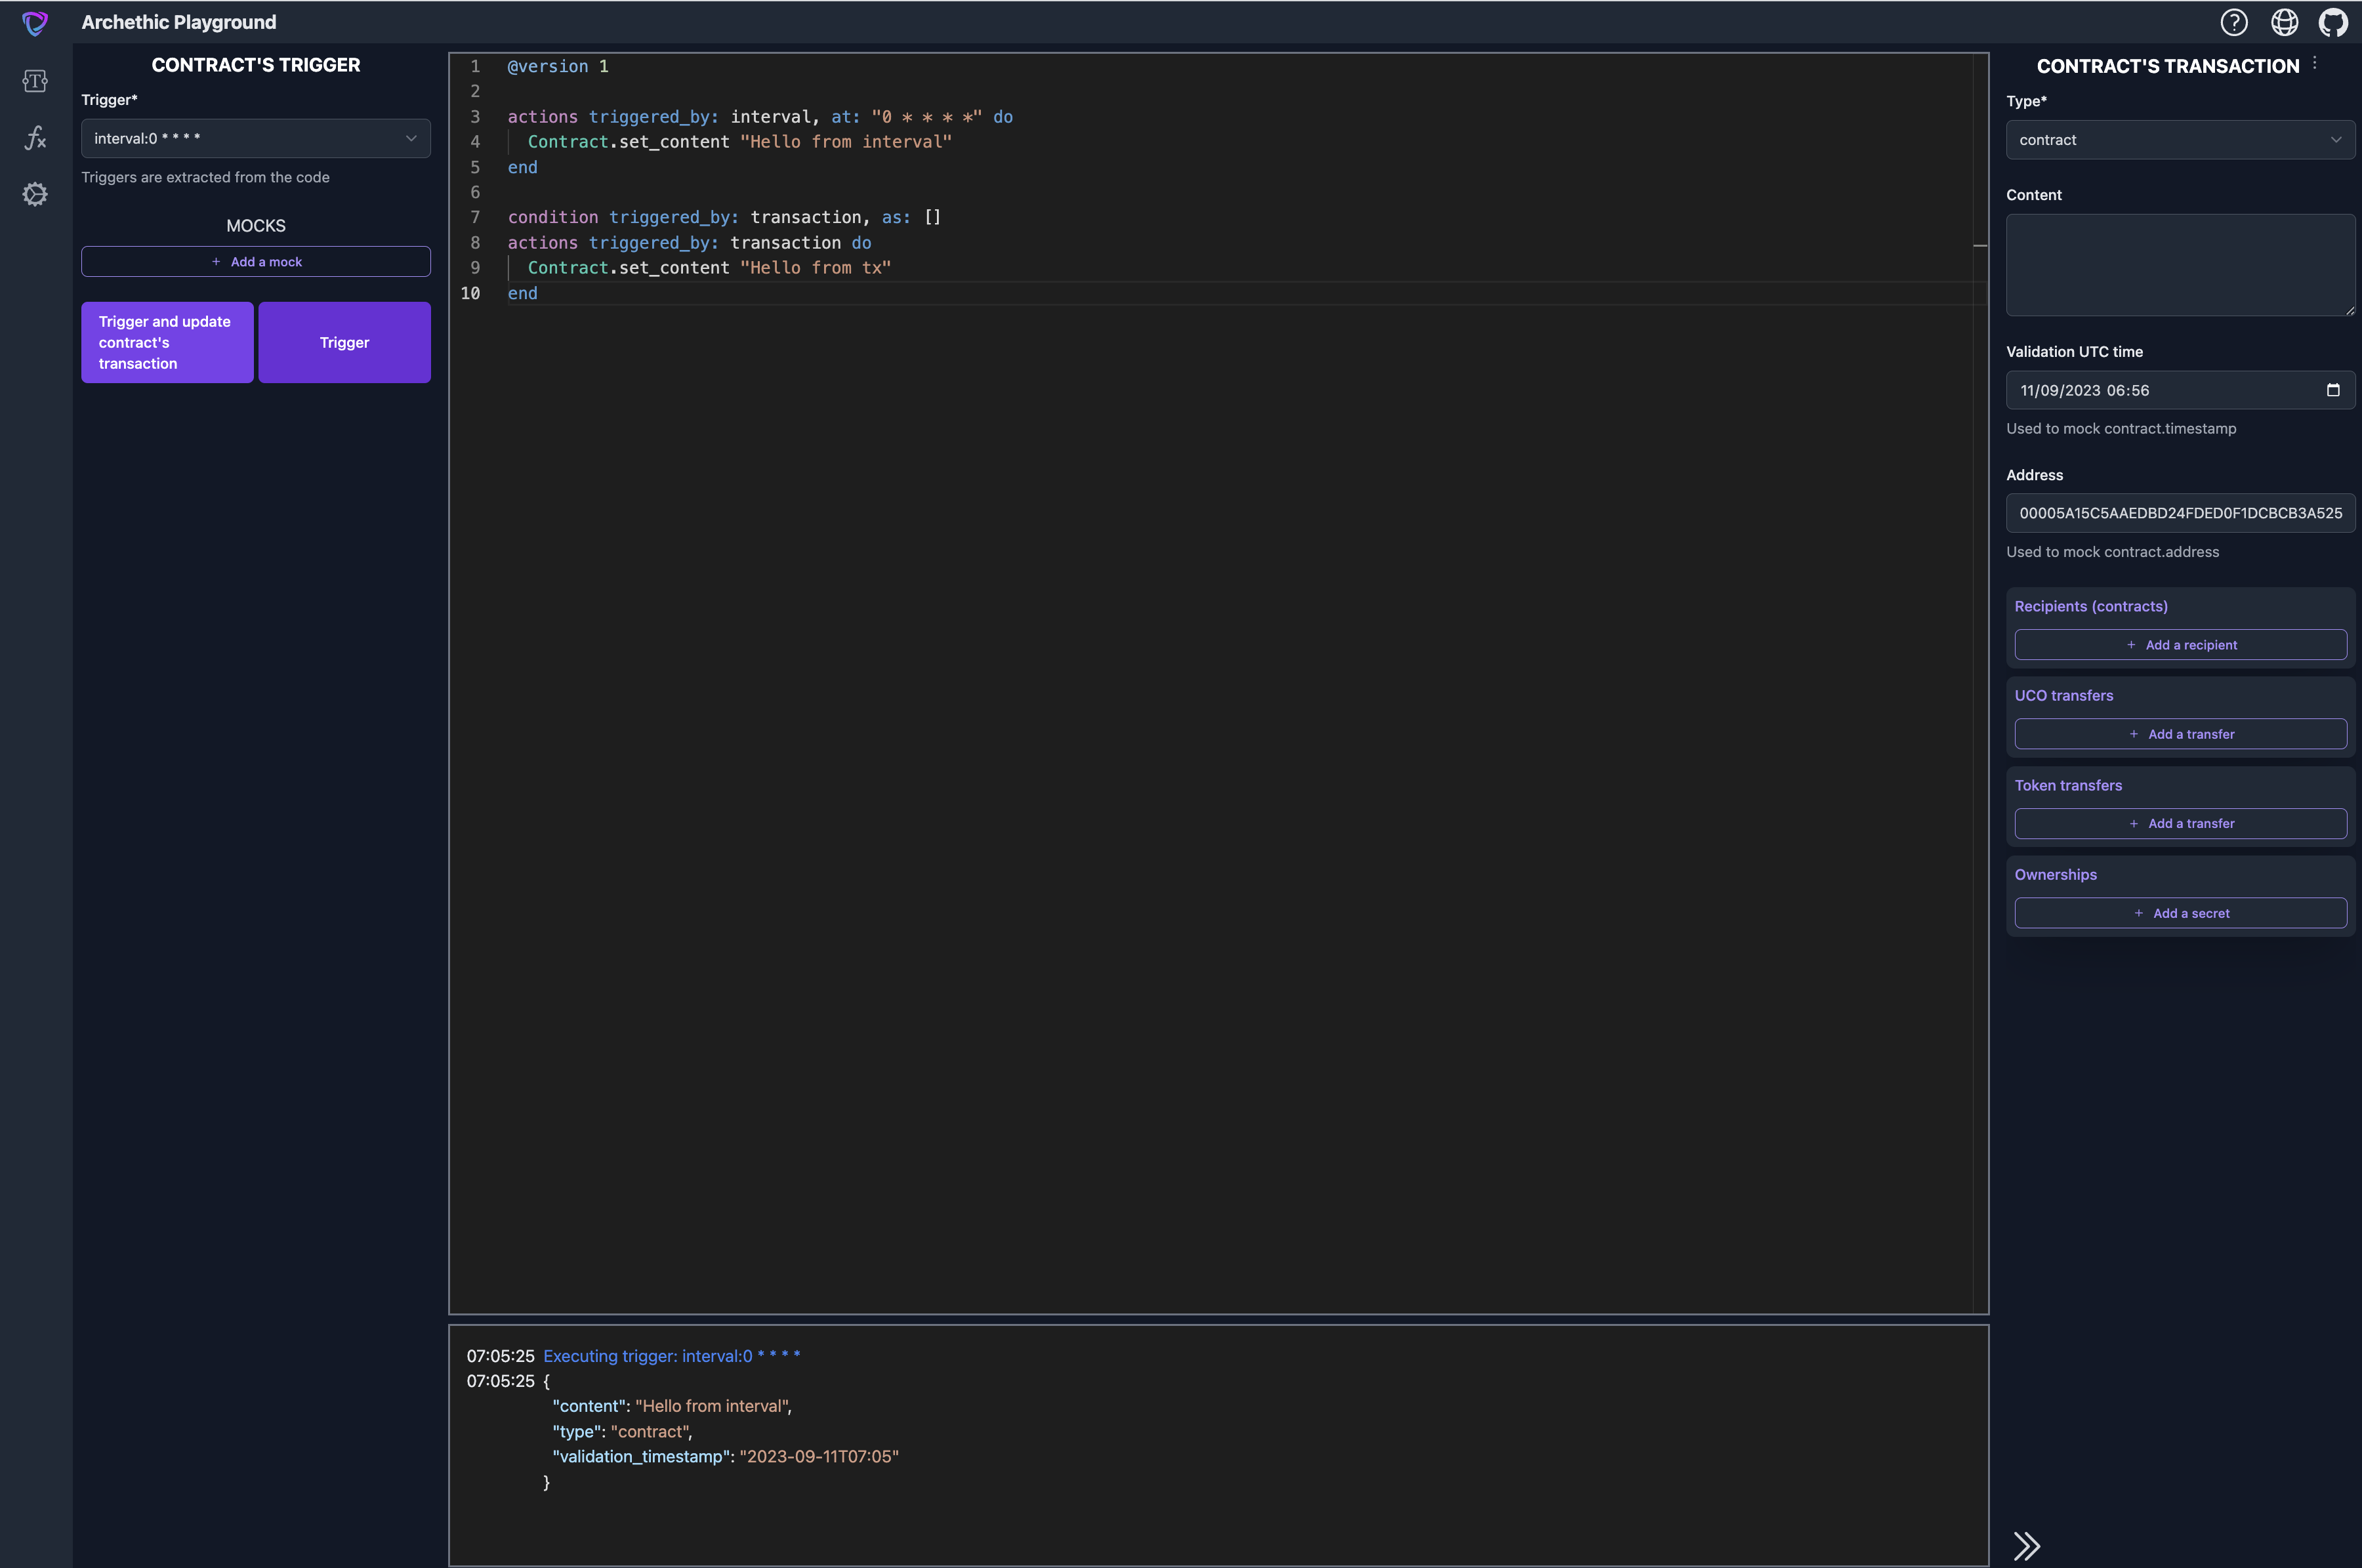
What you see above is the JSON representation of the output transaction payload. Here we can control that my contract behaved as expected. The content is set to "Hello from interval" as expected.
You probably saw the trigger and update contract's transaction button. Let's click on it to see the difference:
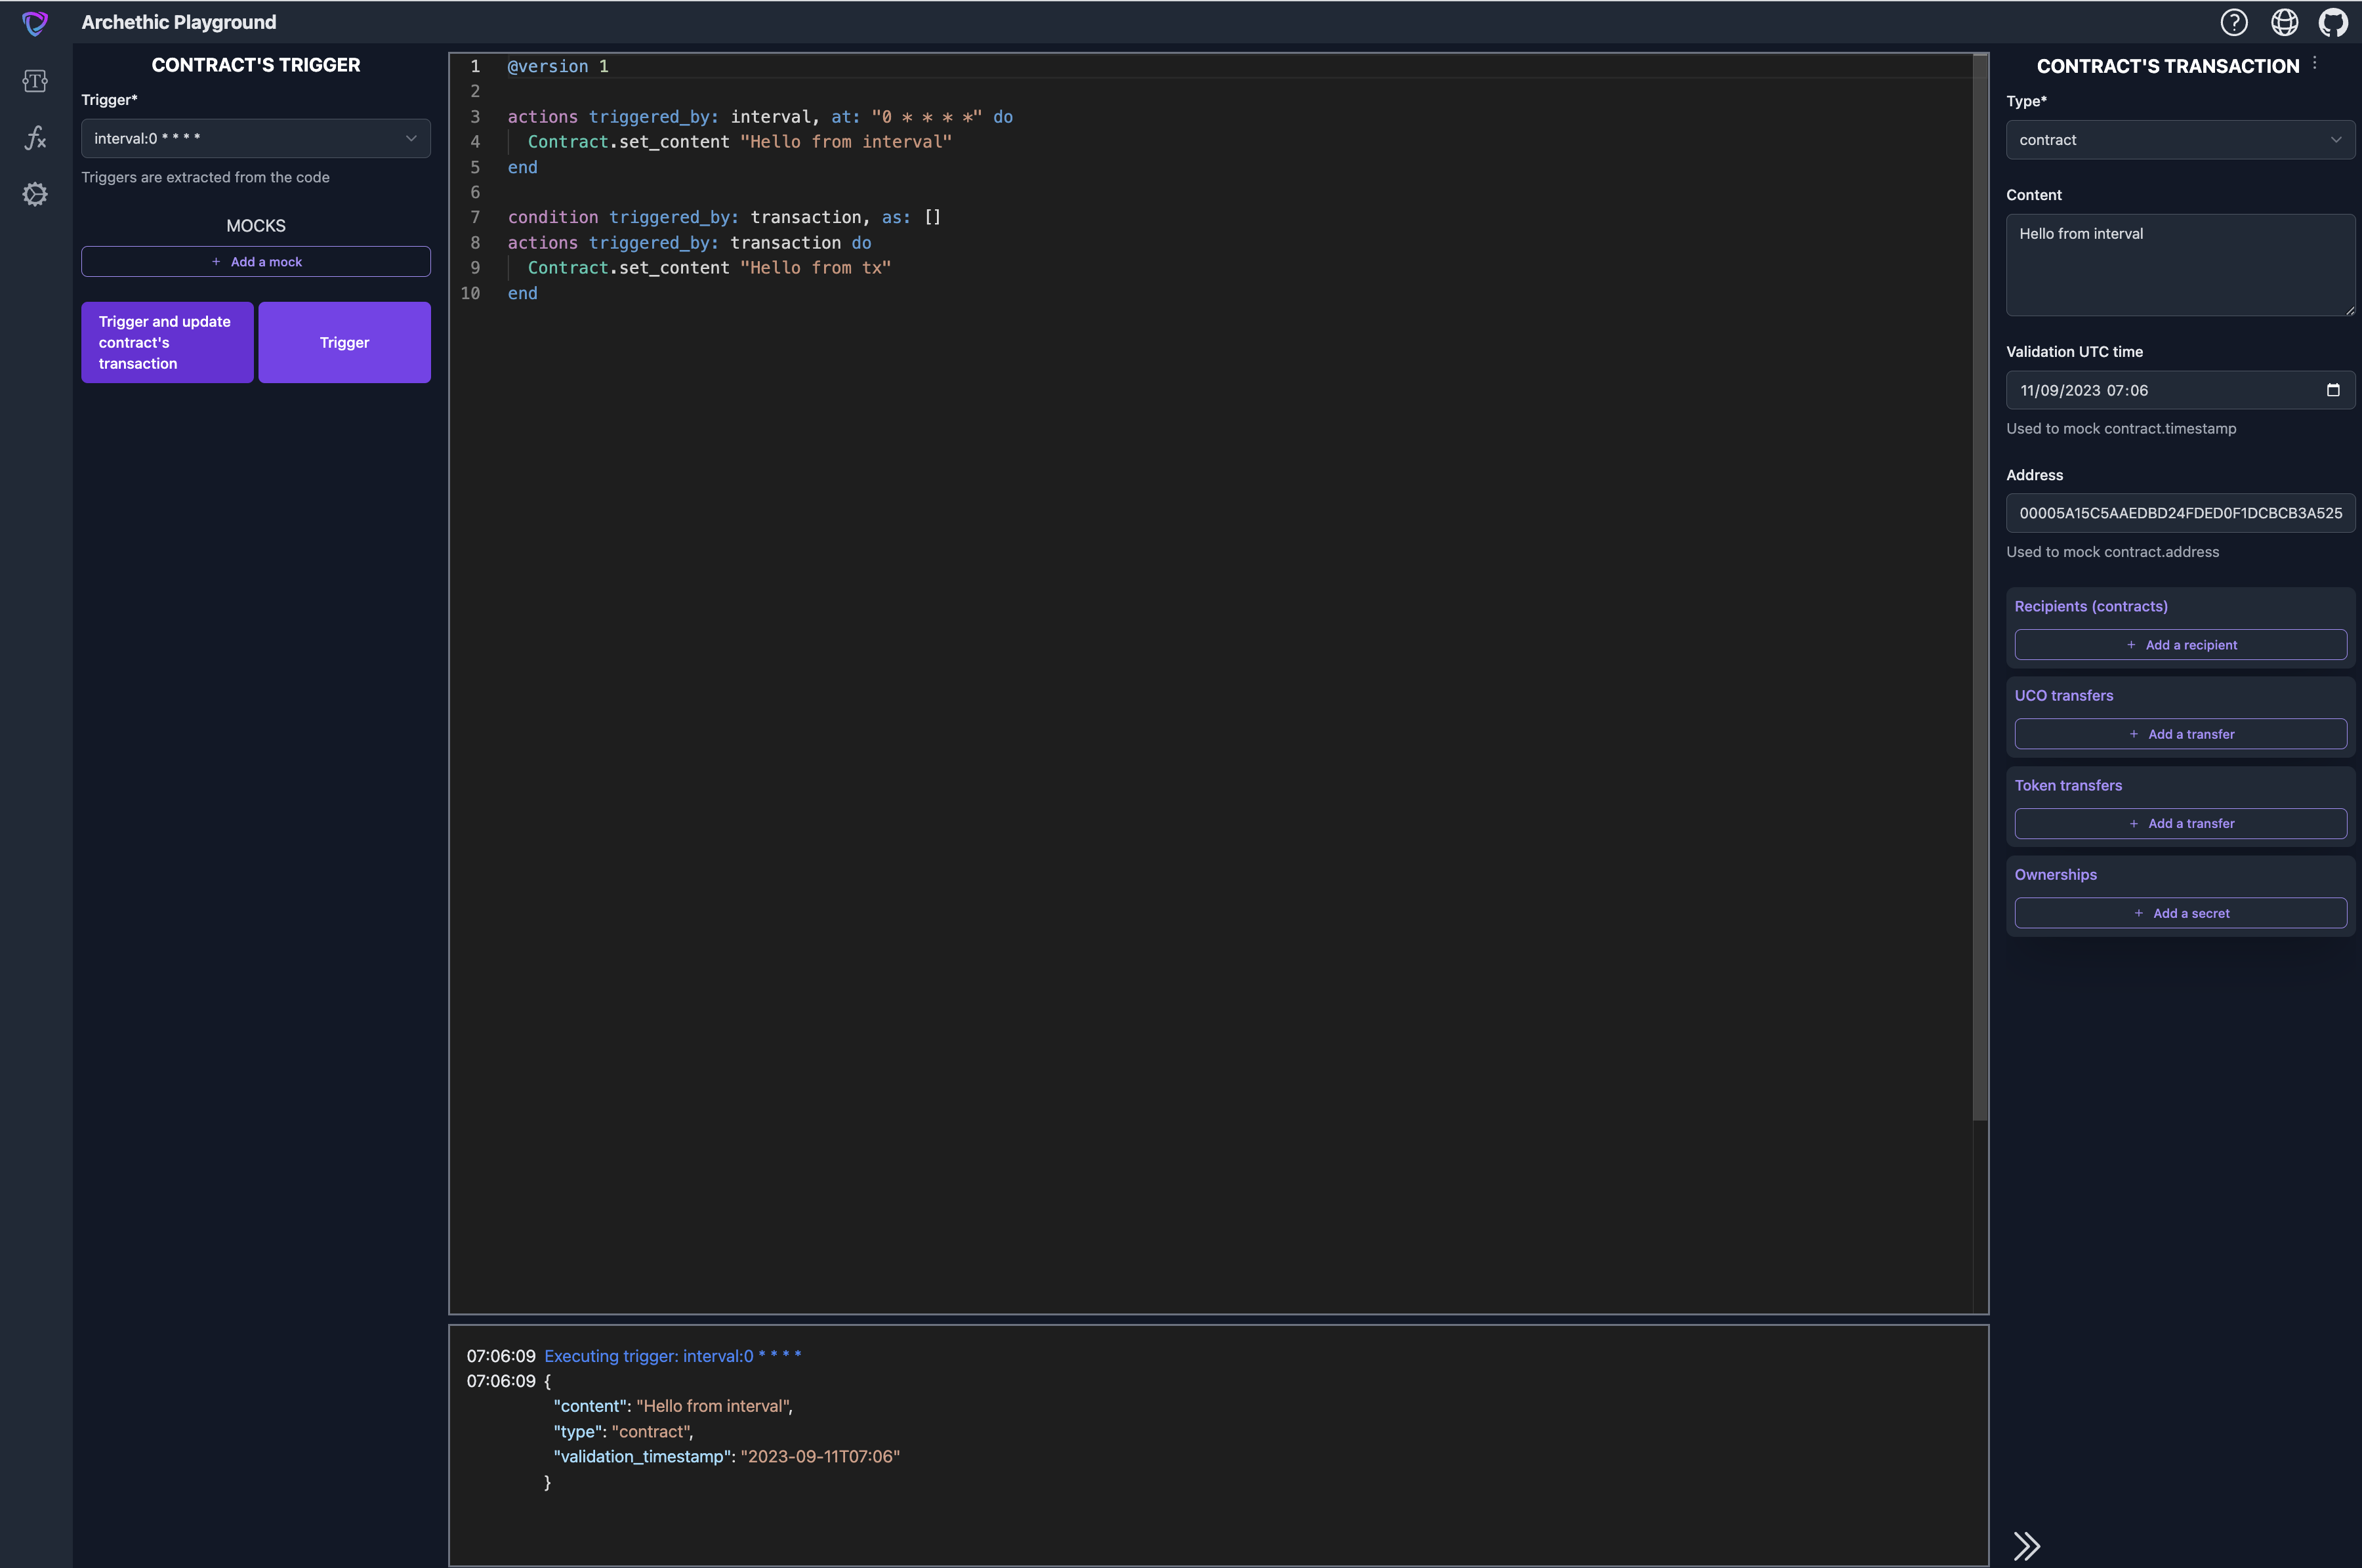
The difference is not easy to spot, but the transaction of the contract (the right panel) has been updated. This is useful to test a sequence of triggers.
Test trigger 'transaction'
This trigger is more complex to test because it requires you to mock the transaction that should trigger the contract. After selecting the transaction from the trigger selector, a form appears:
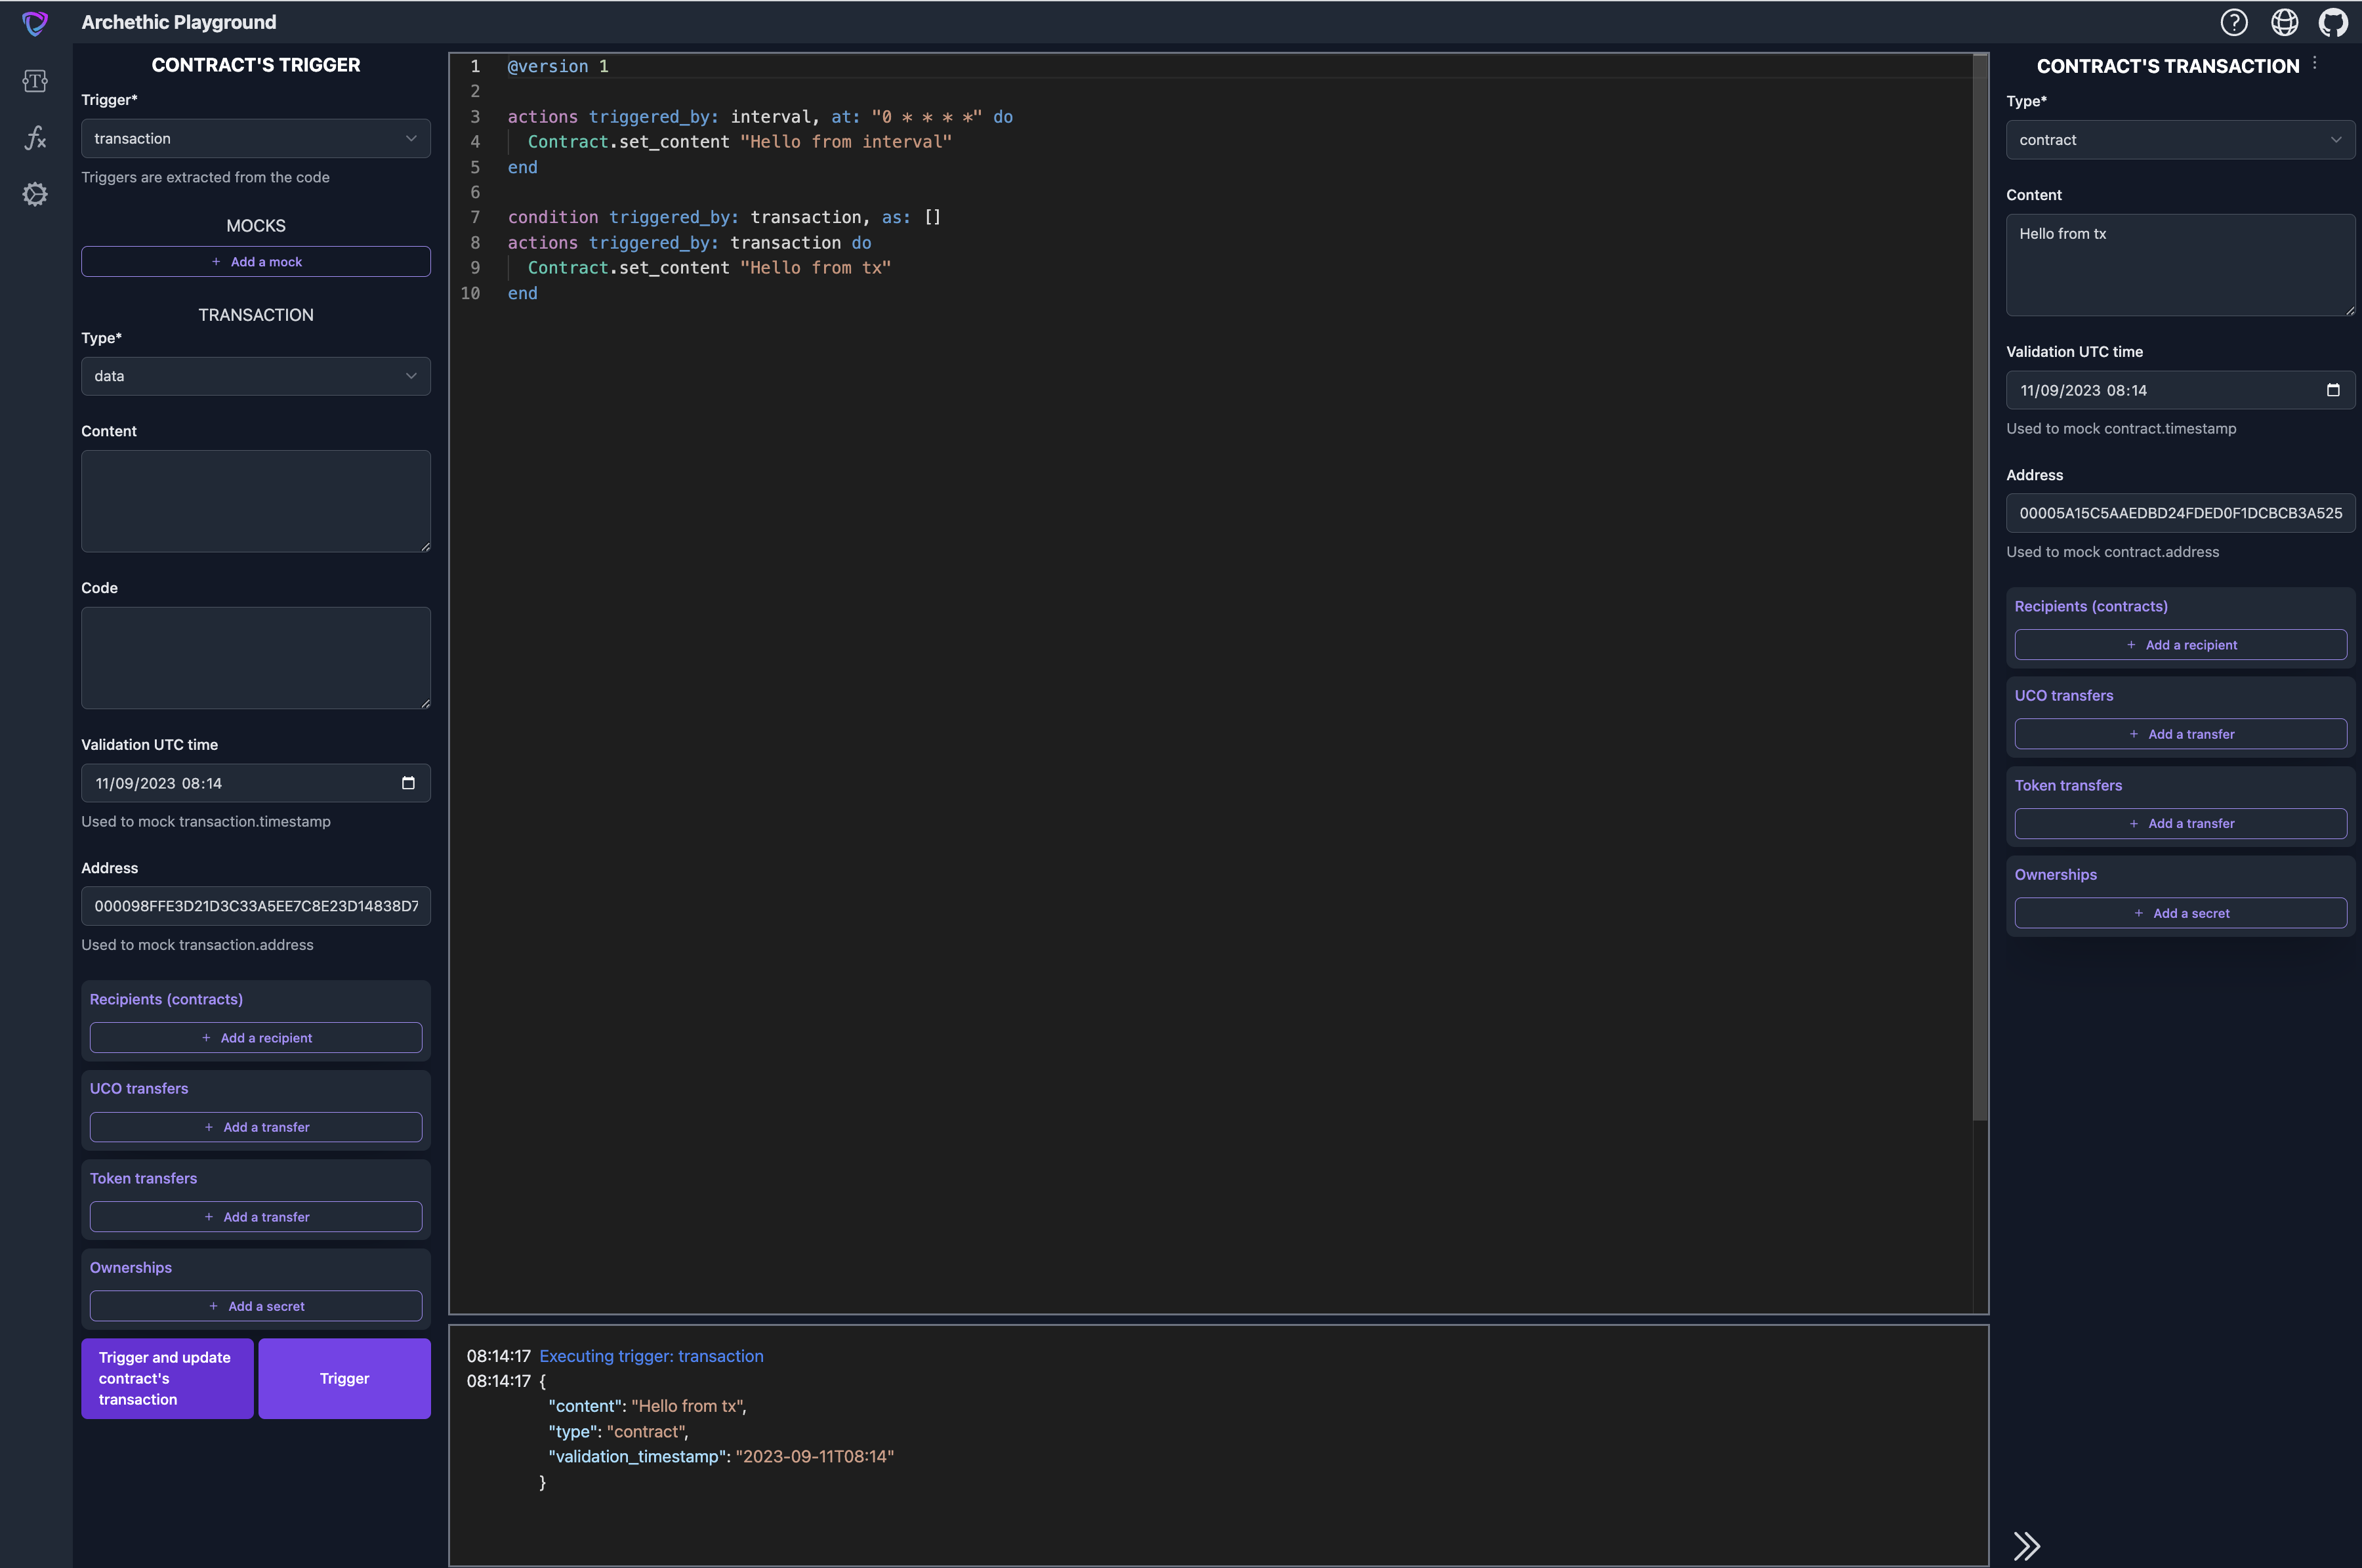
This form is composed of two forms:
- the transaction form
- the mock form
Which results in a very big form that are covered in the links above. For this contract, we'll just submit the form without changing anything.
I can now control that the output transaction payload is correct.
Test trigger 'datetime'
Testing a 'datetime' trigger is similar to testing a trigger 'interval'.
Test trigger 'oracle'
Testing an 'oracle' trigger is similar to testing a trigger 'transaction' (where the transaction is of type 'oracle').
You should now be able to build your own smart contracts and test them! The next step now is to deploy them.